Creating Coginiti Actions
This guide explains how to create automated data workflows using Coginiti Actions to streamline your data processing tasks.
For technical details: Coginiti Actions Reference
Prerequisites
-
SQL assets saved in your catalog
-
Database connections configured
-
Understanding of your workflow dependencies
Create a Basic Coginiti Action
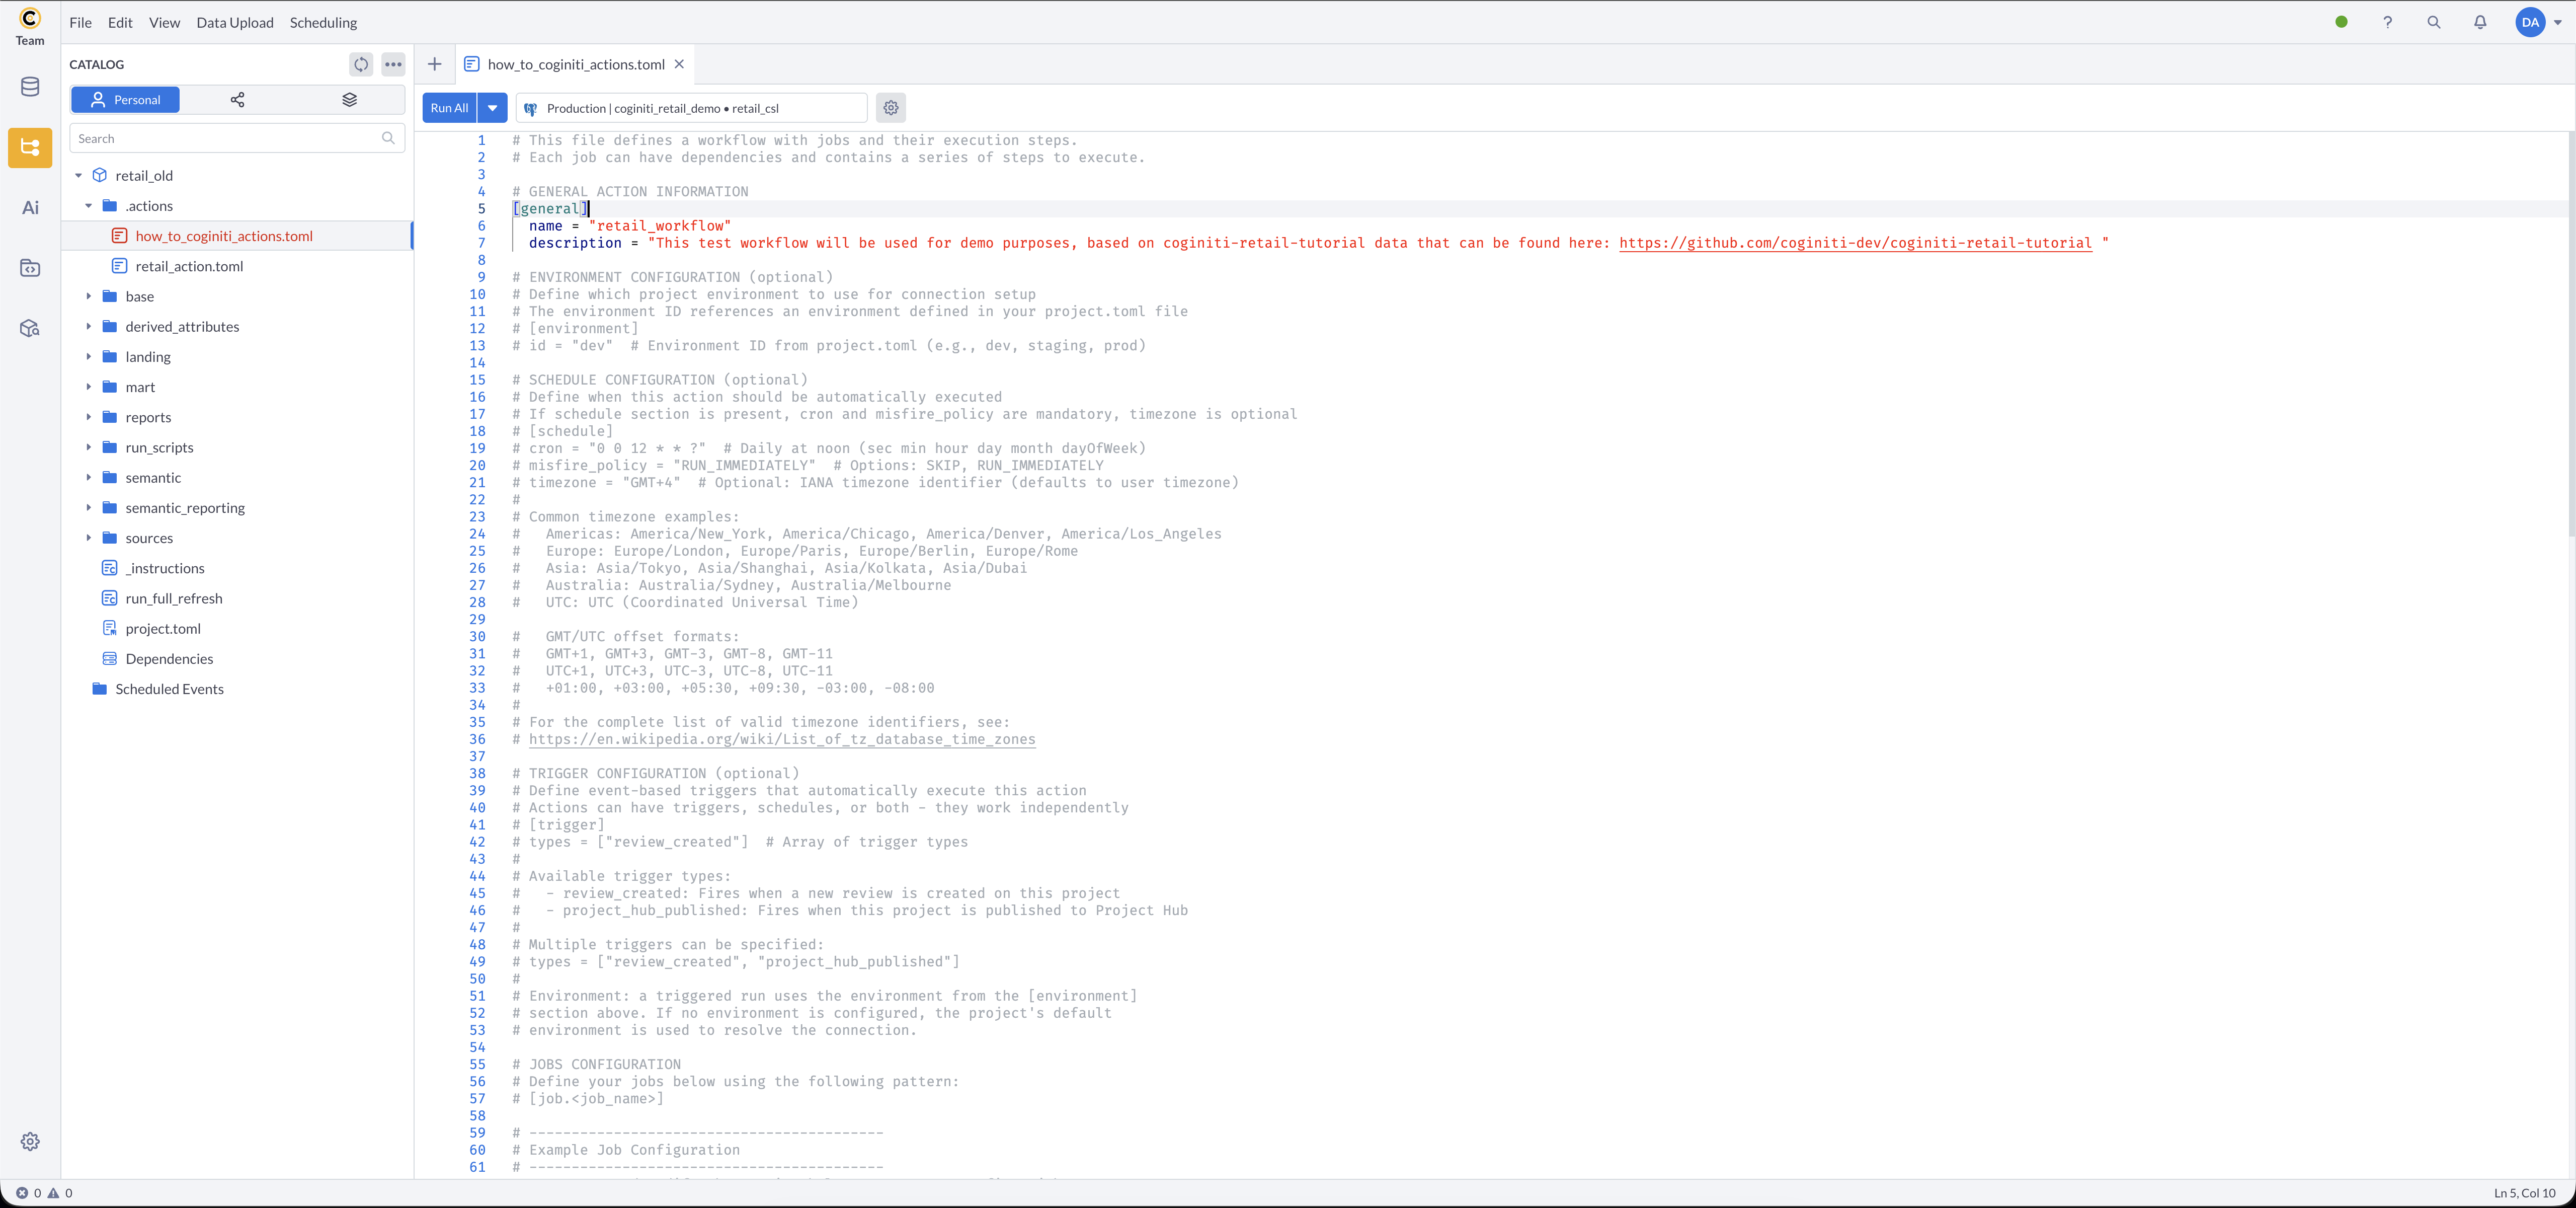
Step 1: Create the TOML File
- Navigate to your catalog
- Navigate to the
.actionsfolder - Create a new file

- Add the basic structure:
[general]
    name = "retail_workflow"
    description = "Retail data pipeline: loads landing data, builds base layer, publishes mart and reports"
Step 2: Configure the Environment (optional)
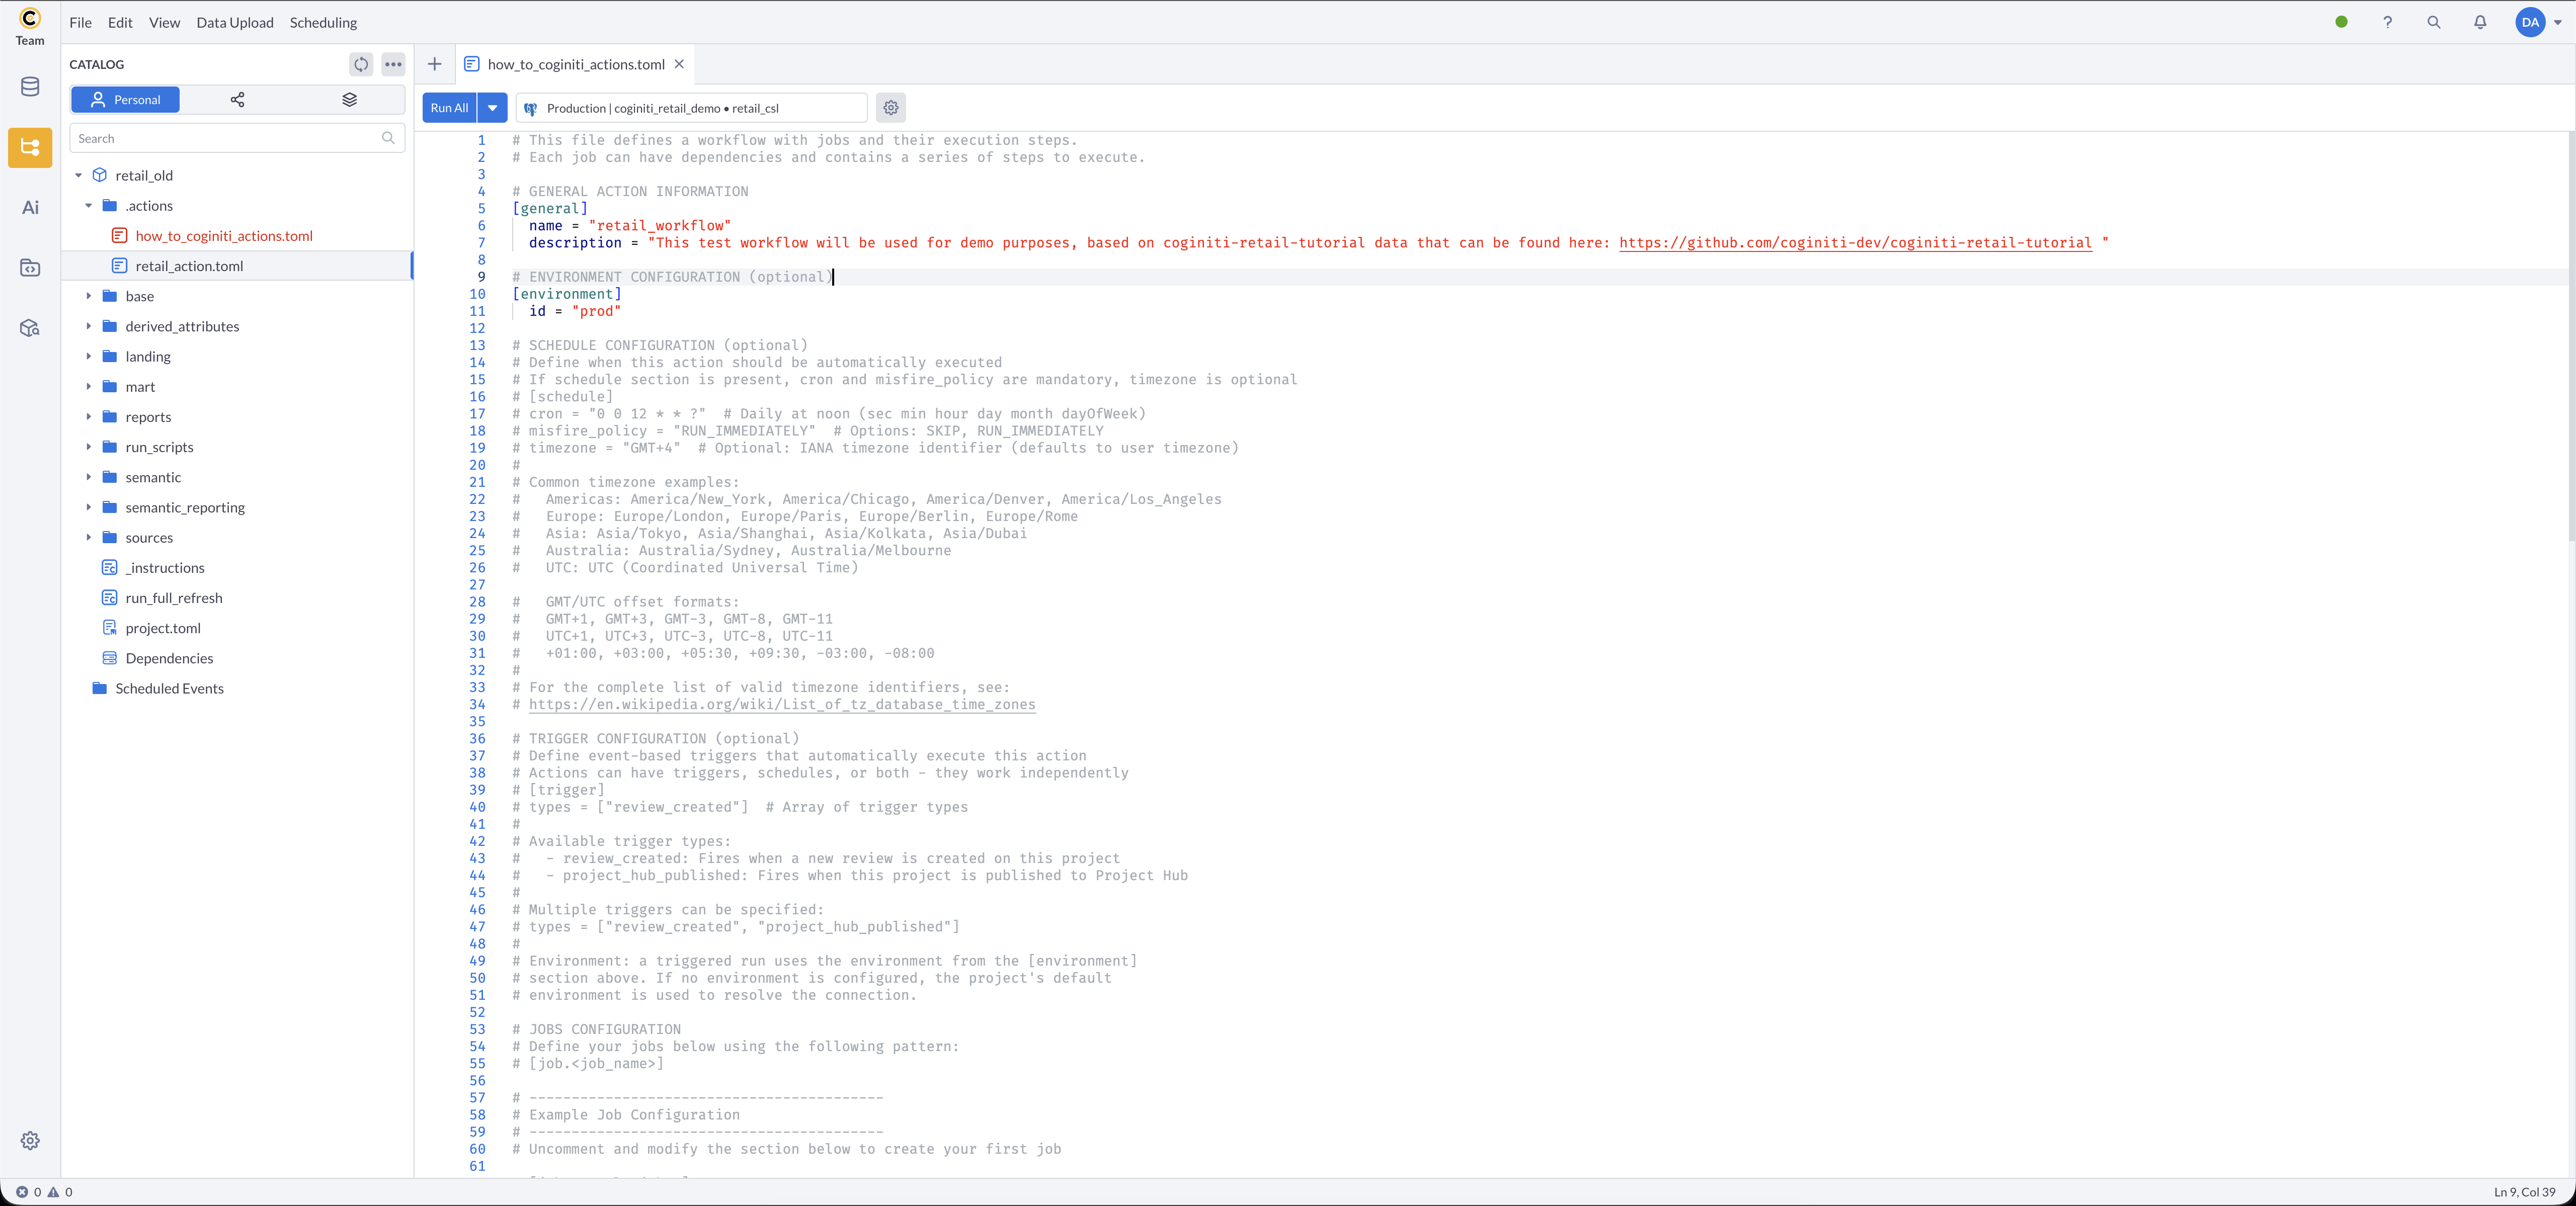
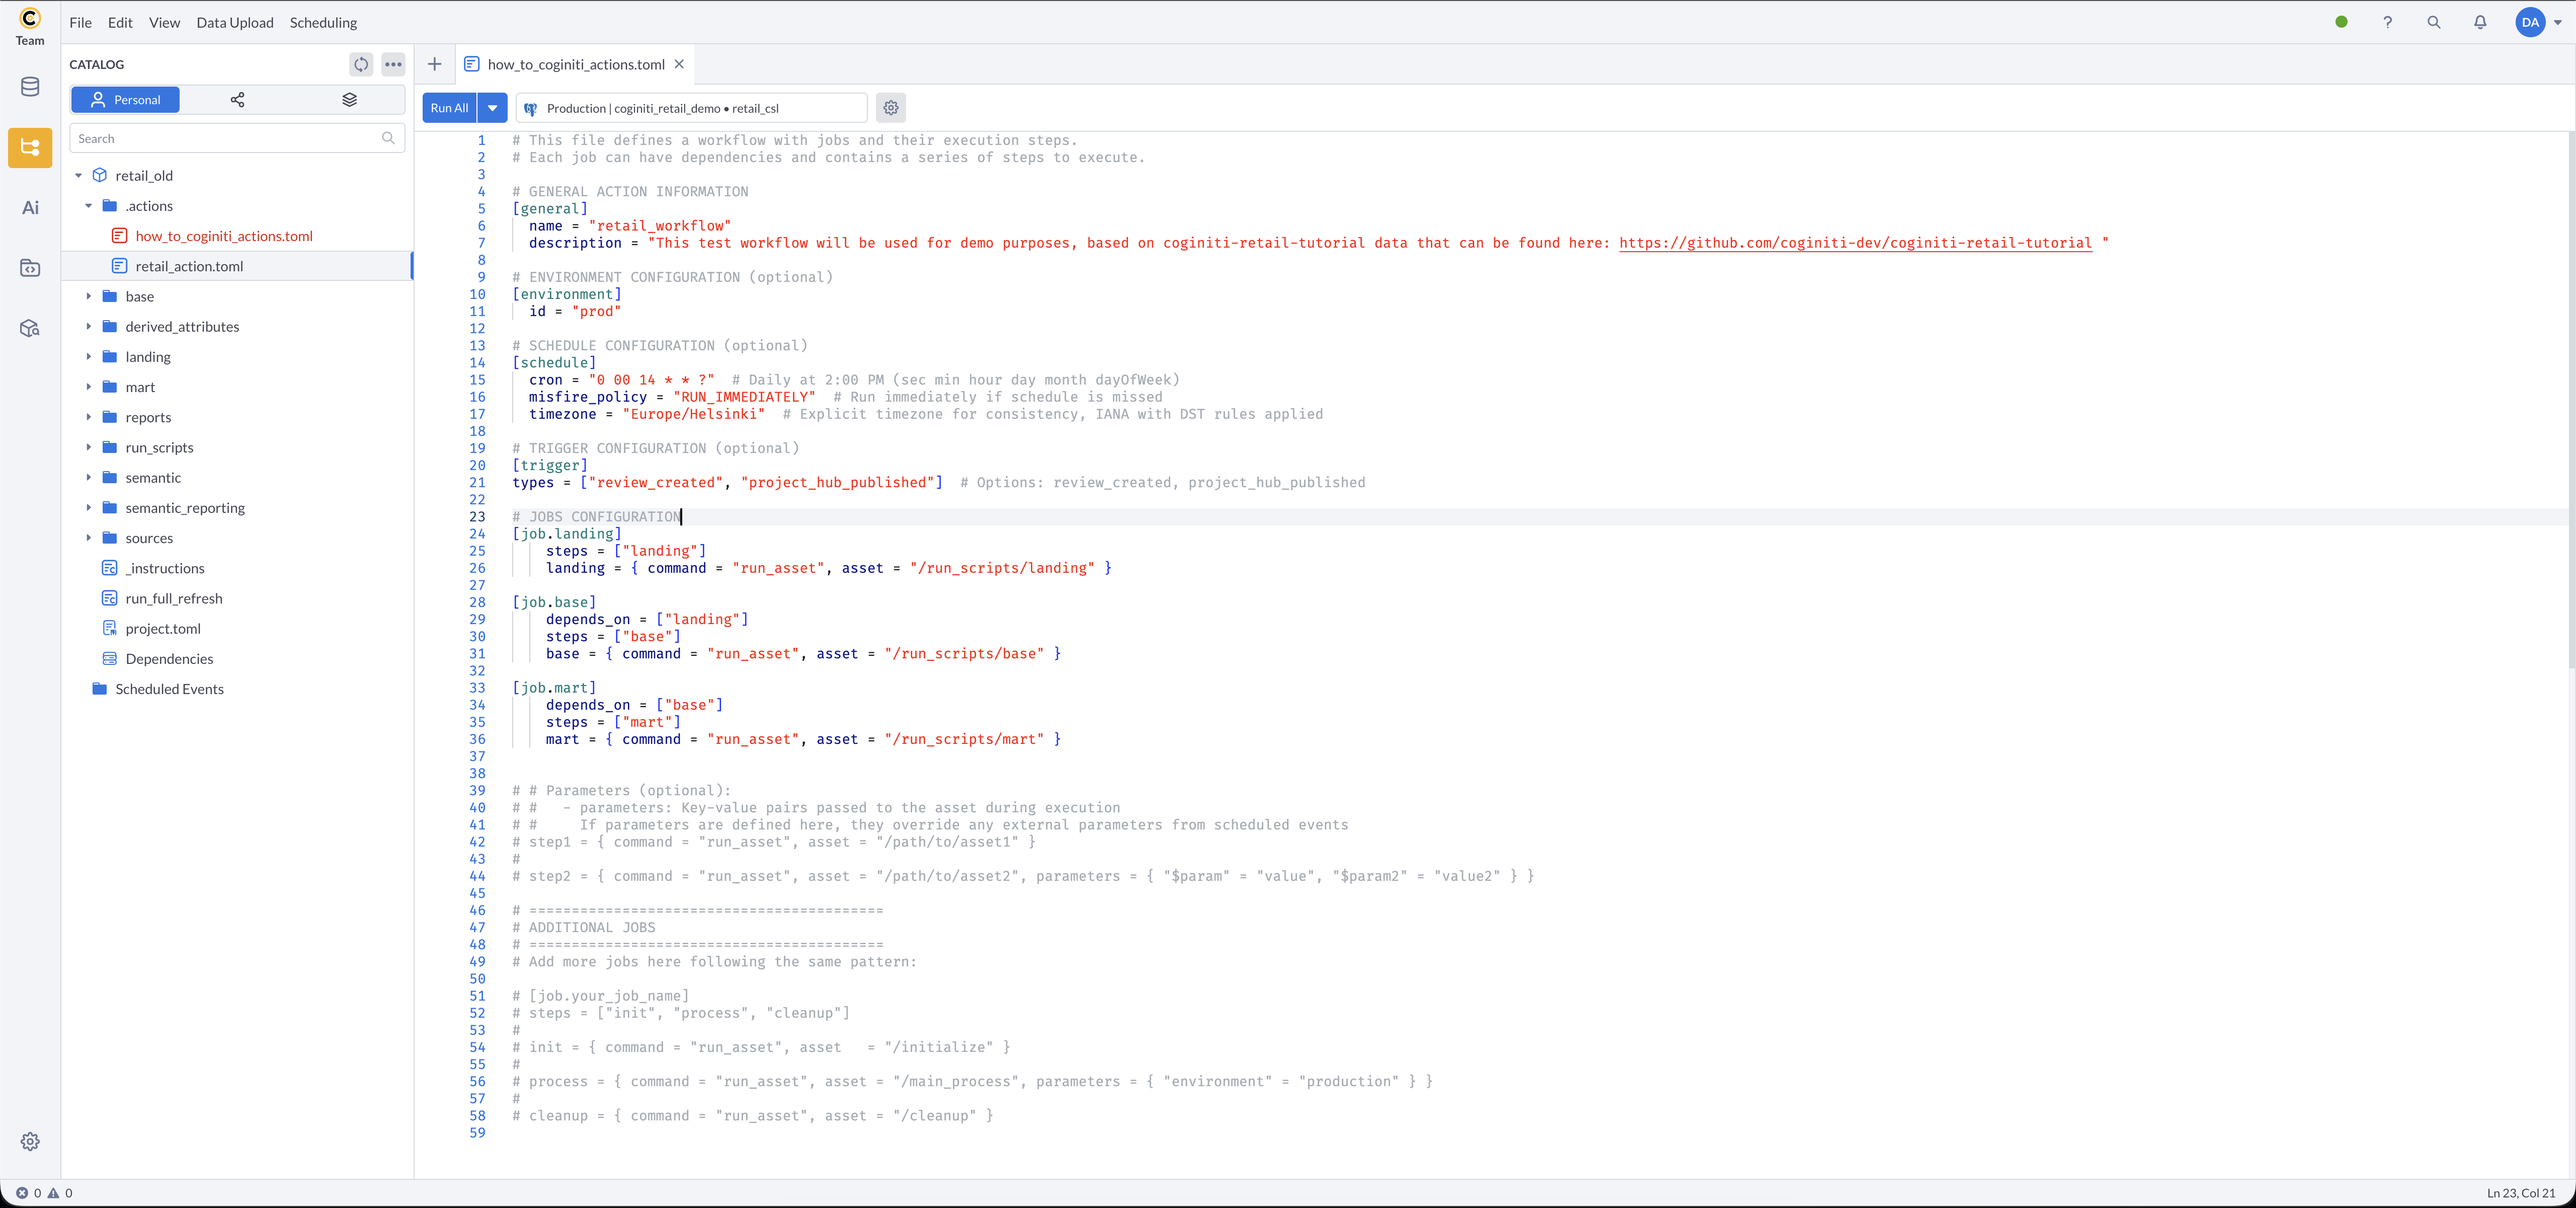
Add an [environment] section to specify which project environment to use for database connections.
The environment ID must match one defined in your project.toml:
[environment]
    id = "prod"
More about Coginiti Environments
Step 3: Configure a Schedule (optional)
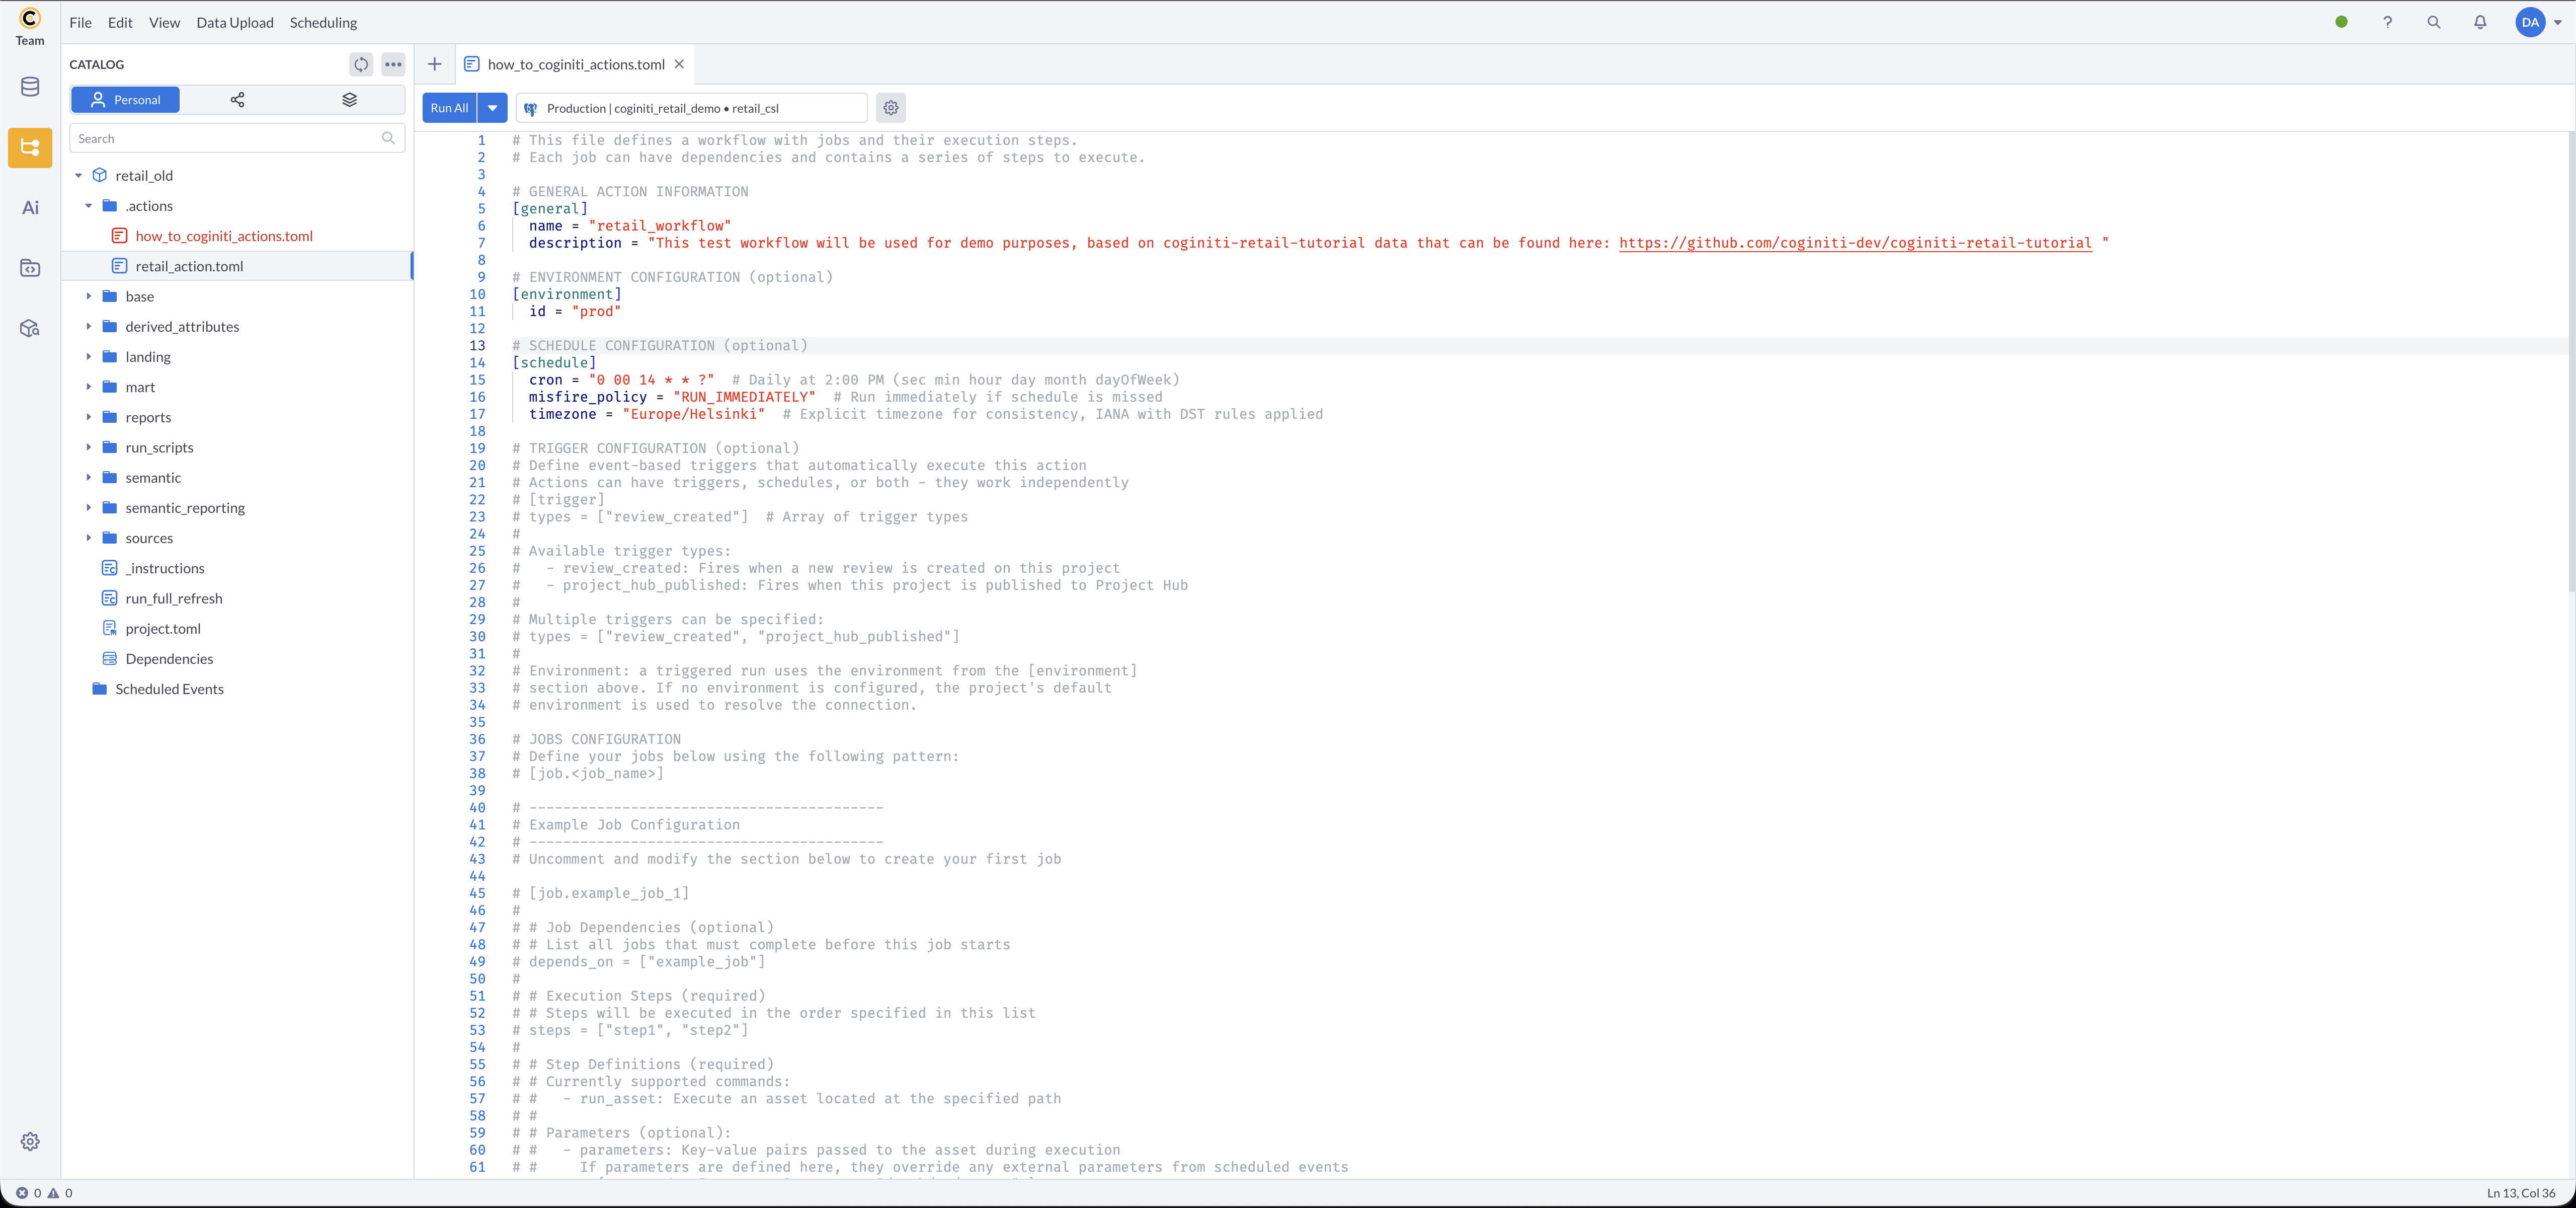
Add a [schedule] section to run your action automatically.
When the [schedule] section is present, cron and misfire_policy are required.
timezone is optional but recommended for clarity:
[schedule]
    cron = "0 15 20 * * ?"
    misfire_policy = "RUN_IMMEDIATELY"
    timezone = "Europe/Helsinki"
Cron format: sec min hour day month dayOfWeek
More about Cron format
misfire_policy options:
RUN_IMMEDIATELY— execute as soon as possible if the scheduled time was missedSKIP— skip the missed execution and wait for the next scheduled time
Timezone: Use IANA timezone identifiers (DST rules applied). Common examples:
- Americas:
America/New_York,America/Chicago,America/Los_Angeles - Europe:
Europe/London,Europe/Paris,Europe/Helsinki - Asia:
Asia/Tokyo,Asia/Singapore,Asia/Dubai - UTC offsets:
GMT+1,UTC-5,+05:30
Step 4: Configure Triggers (optional)
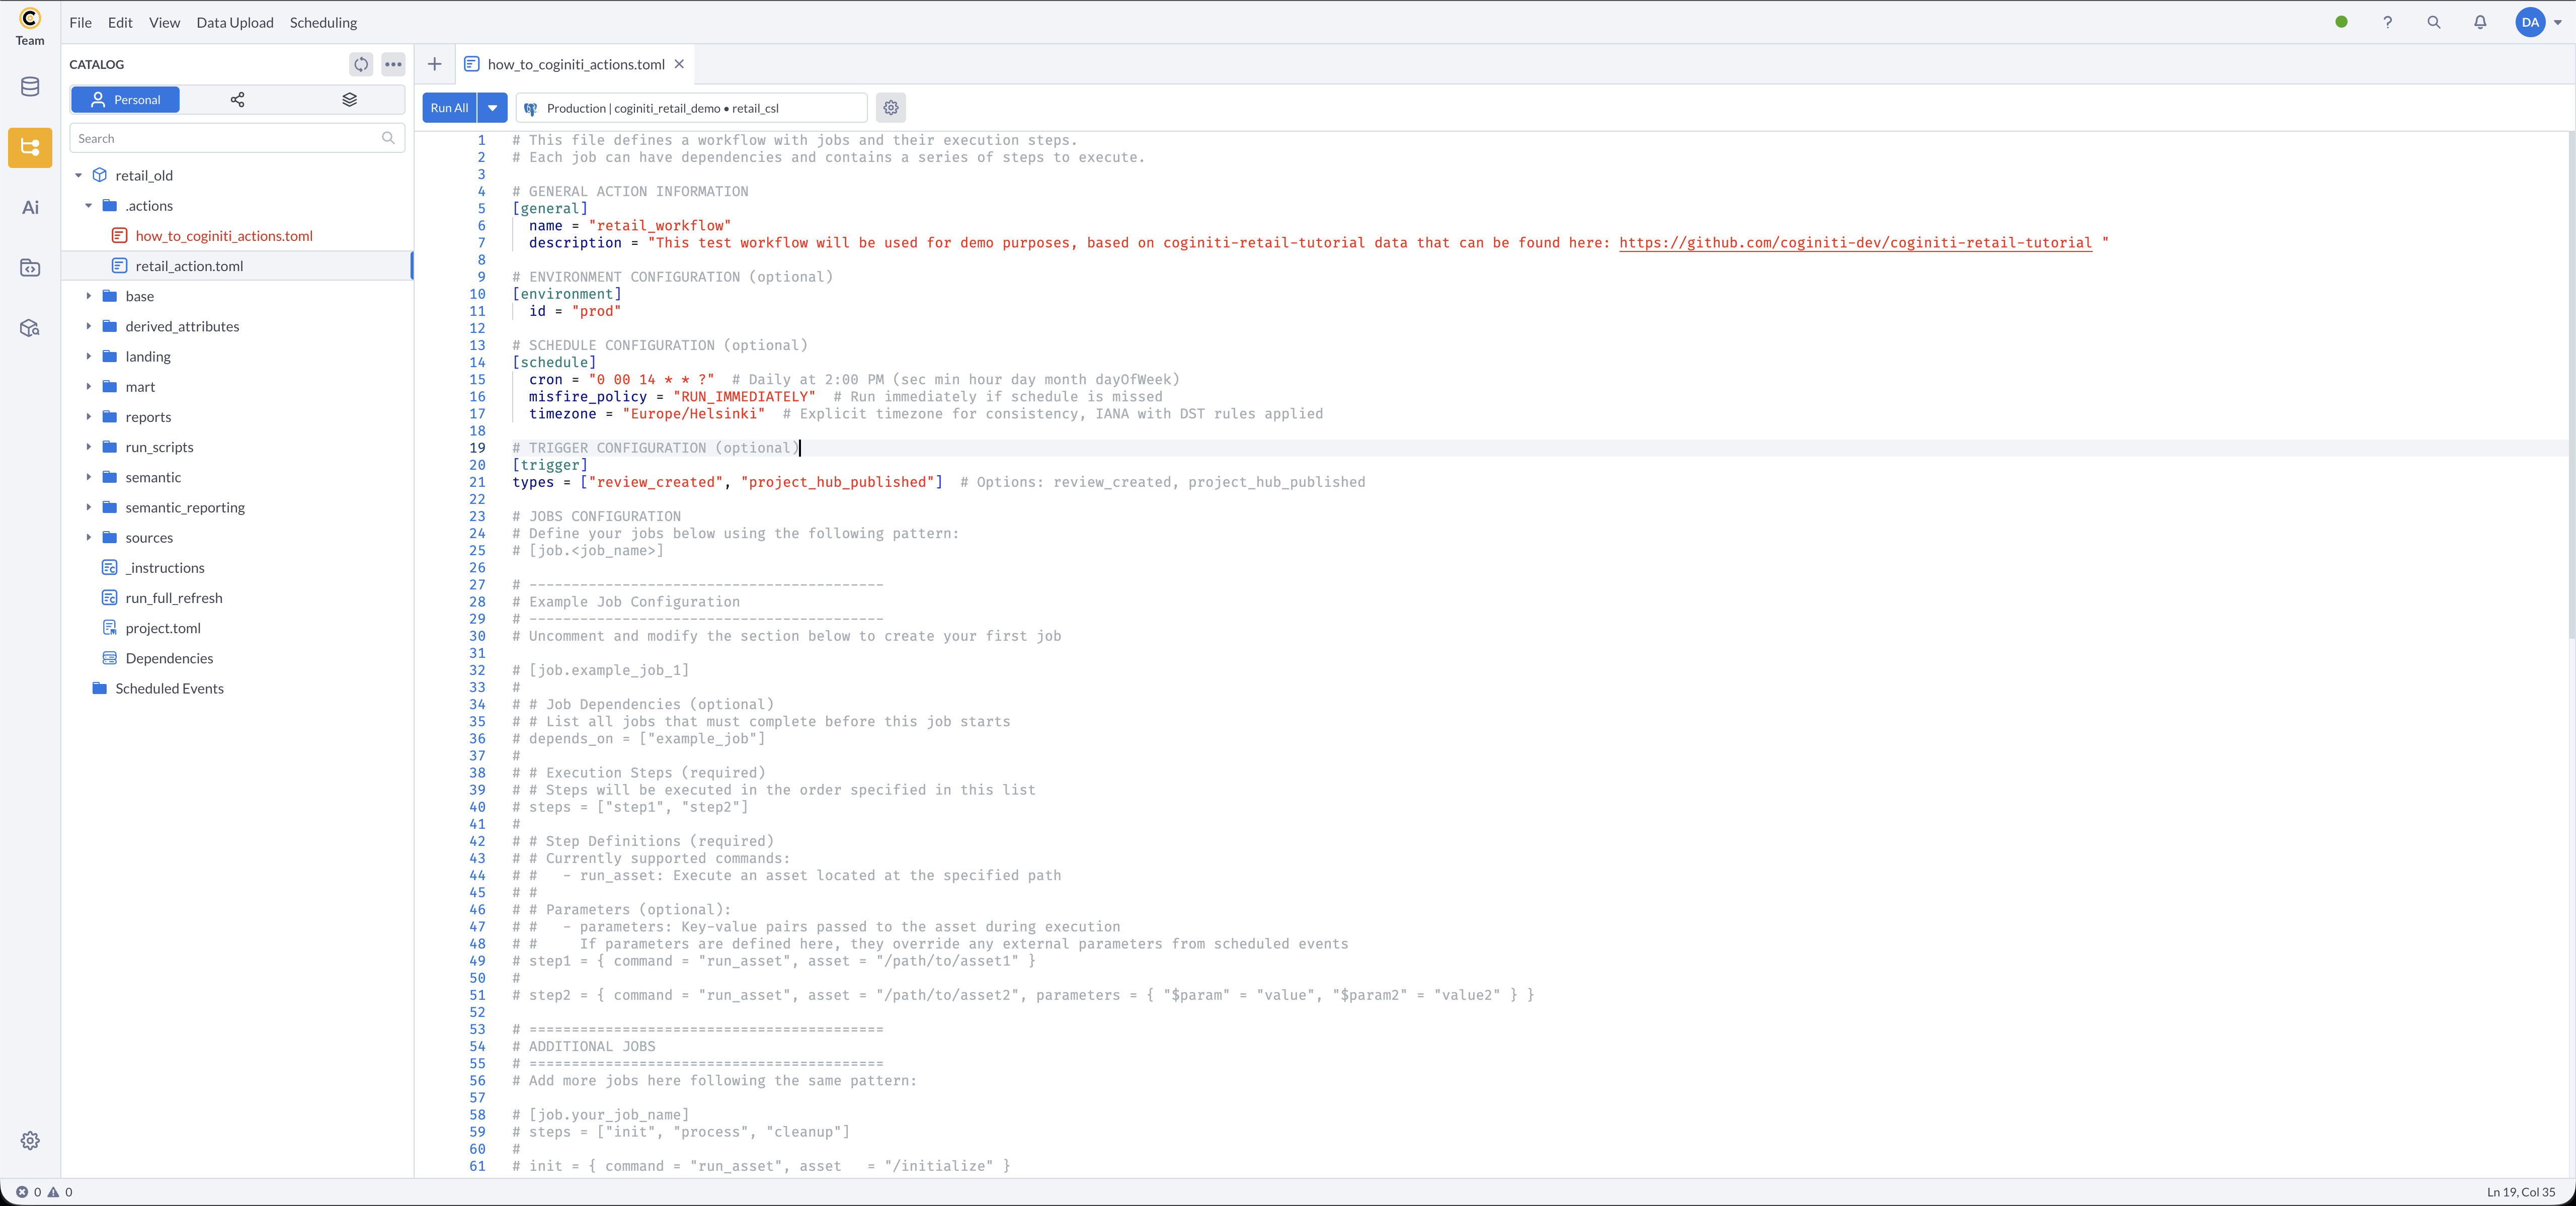
Add a [trigger] section to run your action automatically in response to project events, instead of (or in addition to) a schedule.
When the [trigger] section is present, types is required and must list at least one recognized trigger type:
[trigger]
    types = ["review_created", "project_hub_published"]
Trigger types options:
review_created— runs the action when a project review is createdproject_hub_published— runs the action when the project is published to the Project Hub
The [schedule] and [trigger] sections are independent. You can define a schedule, triggers, both, or neither. When an action lists multiple types, any one of those events starts a run.
Step 5: Define Your Jobs
Add jobs for each logical unit of work:
[job.landing]
    steps = ["landing"]
    landing = { command = "run_asset", asset = "/run_scripts/landing" }

[job.base]
    depends_on = ["landing"]
    steps = ["base"]
    base = { command = "run_asset", asset = "/run_scripts/base" }

[job.mart]
    depends_on = ["base"]
    steps = ["mart"]
    mart = { command = "run_asset", asset = "/run_scripts/mart" }
Add Parameters to Your Workflow
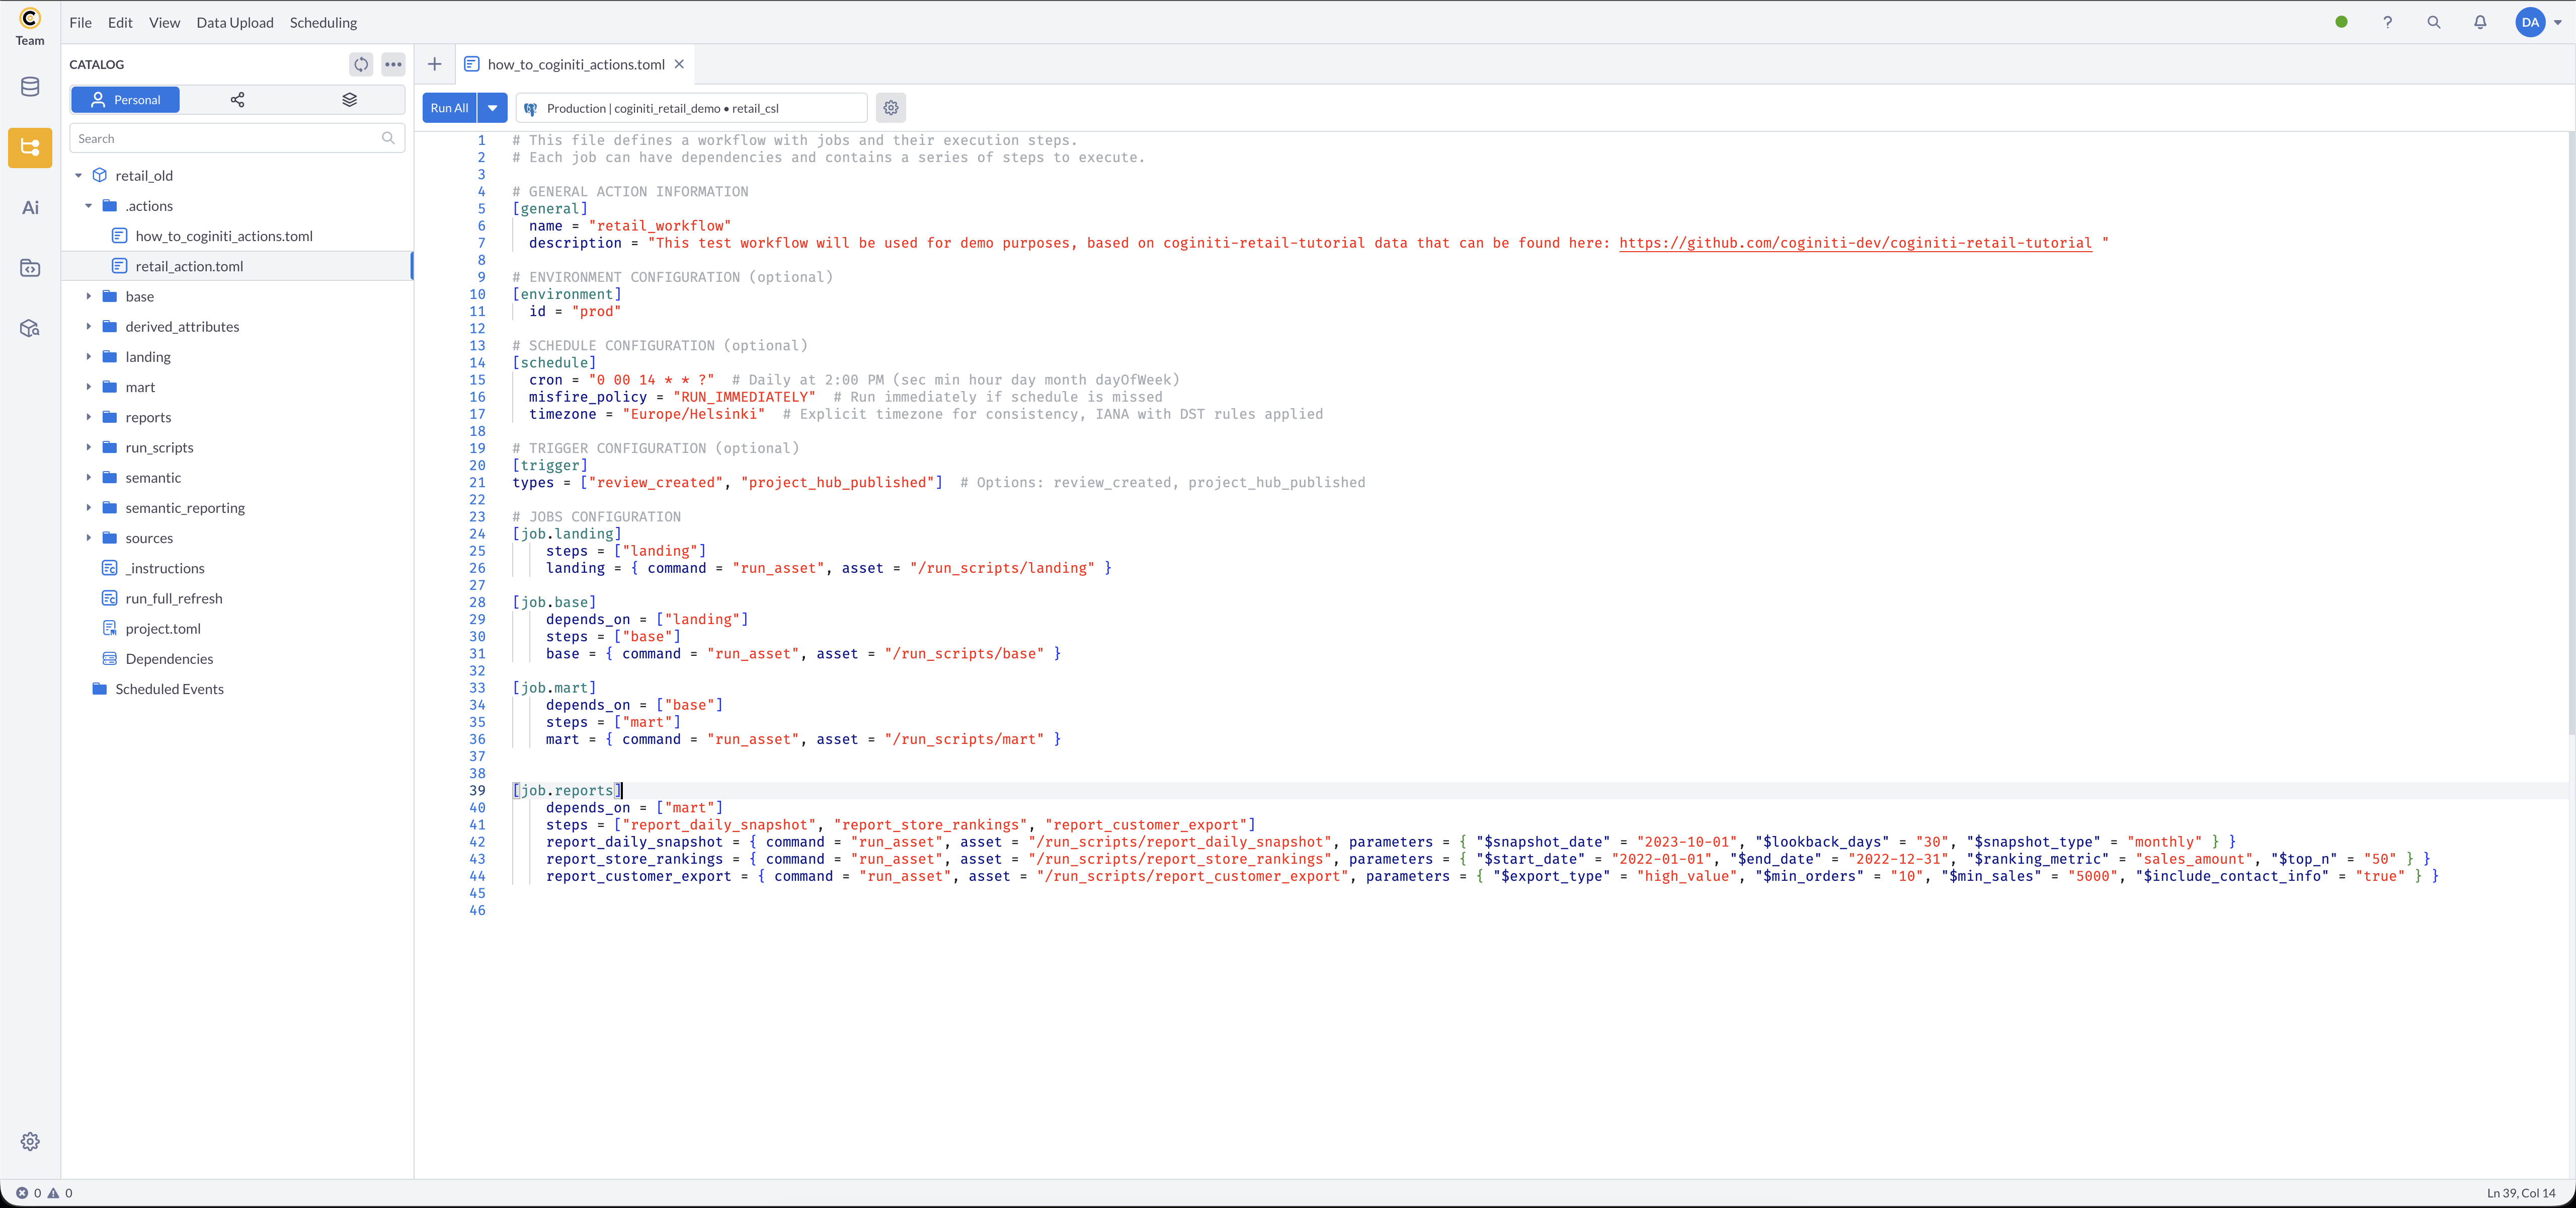
Define Parameters in Steps
Pass runtime parameters to your assets using the parameters key. Parameter names must match the $parameter placeholders defined in your SQL asset.
[job.reports]
    depends_on = ["mart"]
    steps = ["report_daily_snapshot", "report_store_rankings", "report_customer_export"]
    report_daily_snapshot = { command = "run_asset", asset = "/run_scripts/report_daily_snapshot", parameters = { "$snapshot_date" = "2023-10-01", "$lookback_days" = "30", "$snapshot_type" = "monthly" } }
    report_store_rankings = { command = "run_asset", asset = "/run_scripts/report_store_rankings", parameters = { "$start_date" = "2022-01-01", "$end_date" = "2022-12-31", "$ranking_metric" = "sales_amount", "$top_n" = "50" } }
    report_customer_export = { command = "run_asset", asset = "/run_scripts/report_customer_export", parameters = { "$export_type" = "high_value", "$min_orders" = "10", "$min_sales" = "5000", "$include_contact_info" = "true" } }
Configure Job Dependencies
Simple Dependencies
[job.base]
    depends_on = ["landing"]
Multiple Dependencies
[job.reports]
    depends_on = ["landing", "base", "mart"]
Complex Dependency Chains
[job.landing]
    steps = ["landing"]
    landing = { command = "run_asset", asset = "/run_scripts/landing" }

[job.base]
    depends_on = ["landing"]
    steps = ["base"]
    base = { command = "run_asset", asset = "/run_scripts/base" }

[job.mart]
    depends_on = ["base"]
    steps = ["mart"]
    mart = { command = "run_asset", asset = "/run_scripts/mart" }

[job.reports]
    depends_on = ["mart"]
    steps = ["report_daily_snapshot", "report_store_rankings", "report_customer_export"]
    report_daily_snapshot = { command = "run_asset", asset = "/run_scripts/report_daily_snapshot", parameters = { "$snapshot_date" = "2023-10-01", "$lookback_days" = "30", "$snapshot_type" = "monthly" } }
    report_store_rankings = { command = "run_asset", asset = "/run_scripts/report_store_rankings", parameters = { "$start_date" = "2022-01-01", "$end_date" = "2022-12-31", "$ranking_metric" = "sales_amount", "$top_n" = "50" } }
    report_customer_export = { command = "run_asset", asset = "/run_scripts/report_customer_export", parameters = { "$export_type" = "high_value", "$min_orders" = "10", "$min_sales" = "5000", "$include_contact_info" = "true" } }
Organize Multiple Steps
Sequential Steps in a Job
Steps within a job execute in the order listed in the steps array. Use this to run multiple assets as a single logical unit:
[job.reports]
    depends_on = ["mart"]
    steps = ["report_daily_snapshot", "report_store_rankings", "report_customer_export"]
    report_daily_snapshot = { command = "run_asset", asset = "/run_scripts/report_daily_snapshot", parameters = { "$snapshot_date" = "2023-10-01", "$lookback_days" = "30", "$snapshot_type" = "monthly" } }
    report_store_rankings = { command = "run_asset", asset = "/run_scripts/report_store_rankings", parameters = { "$start_date" = "2022-01-01", "$end_date" = "2022-12-31", "$ranking_metric" = "sales_amount", "$top_n" = "50" } }
    report_customer_export = { command = "run_asset", asset = "/run_scripts/report_customer_export", parameters = { "$export_type" = "high_value", "$min_orders" = "10", "$min_sales" = "5000", "$include_contact_info" = "true" } }
Handle Different Scenarios
Data Quality Workflow
Embed data quality tests directly inside your run scripts alongside the publication steps. This ensures tests run immediately after each layer is loaded:
[general]
    name = "retail_workflow"
    description = "Retail data pipeline with integrated data quality checks"

[job.landing]
    steps = ["landing"]
    landing = { command = "run_asset", asset = "/run_scripts/landing" }

[job.base]
    depends_on = ["landing"]
    steps = ["base"]
    base = { command = "run_asset", asset = "/run_scripts/base" }
The landing run script publishes landing tables and immediately tests source data:
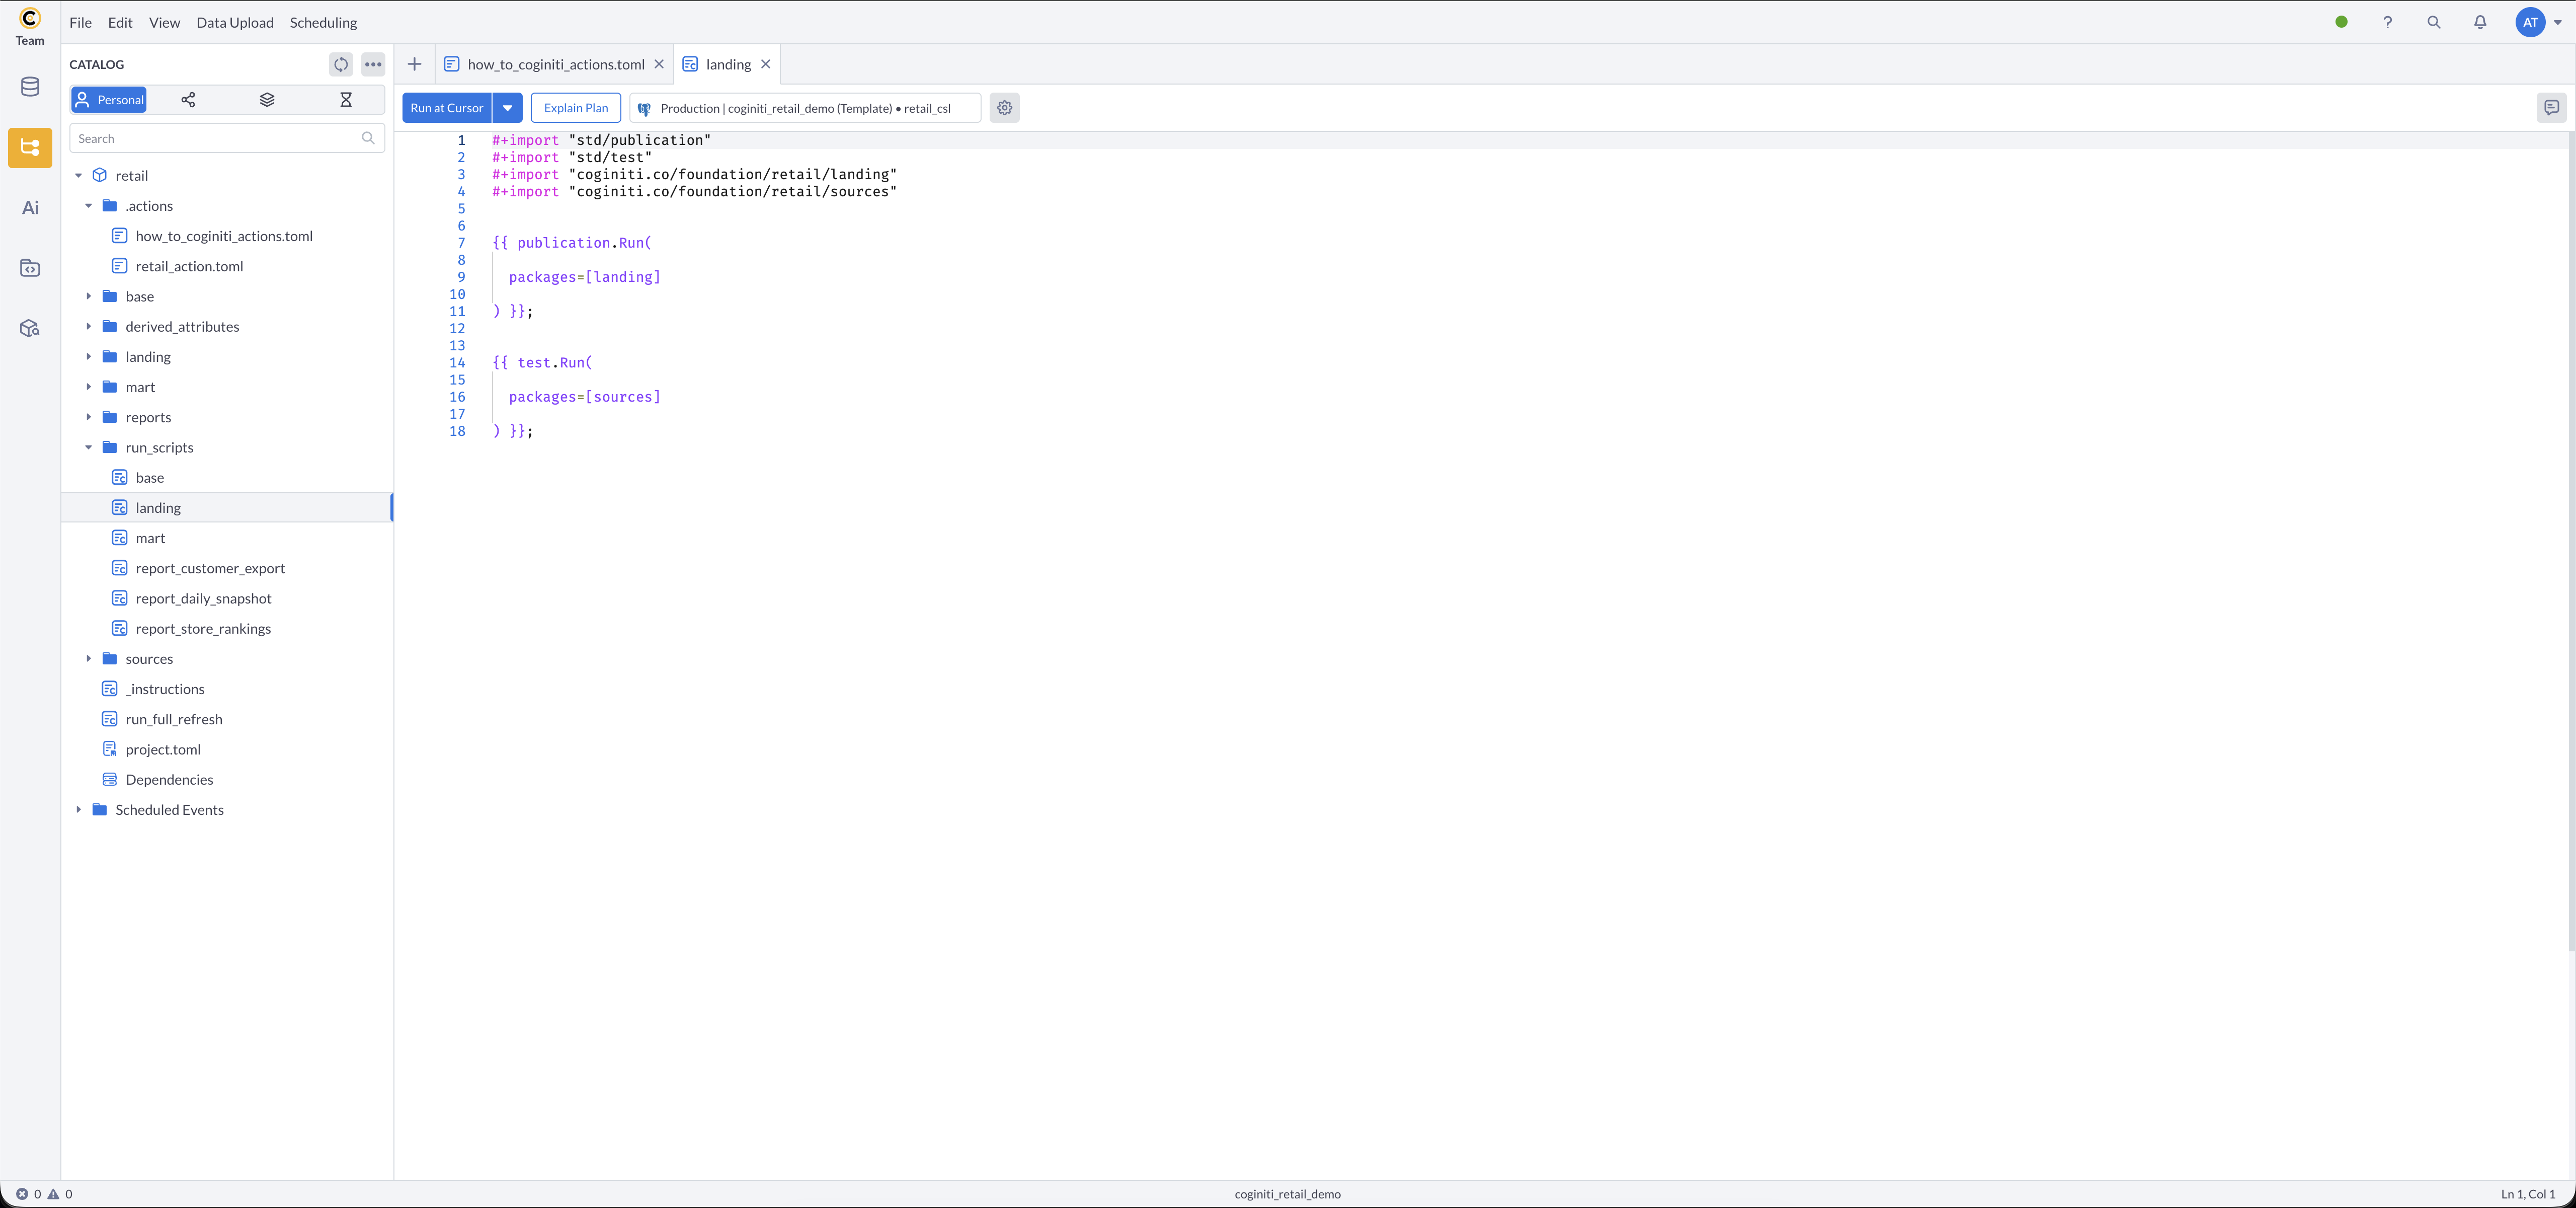
The base run script publishes all base dimensions and runs consistency tests:

Parallel Processing Workflow
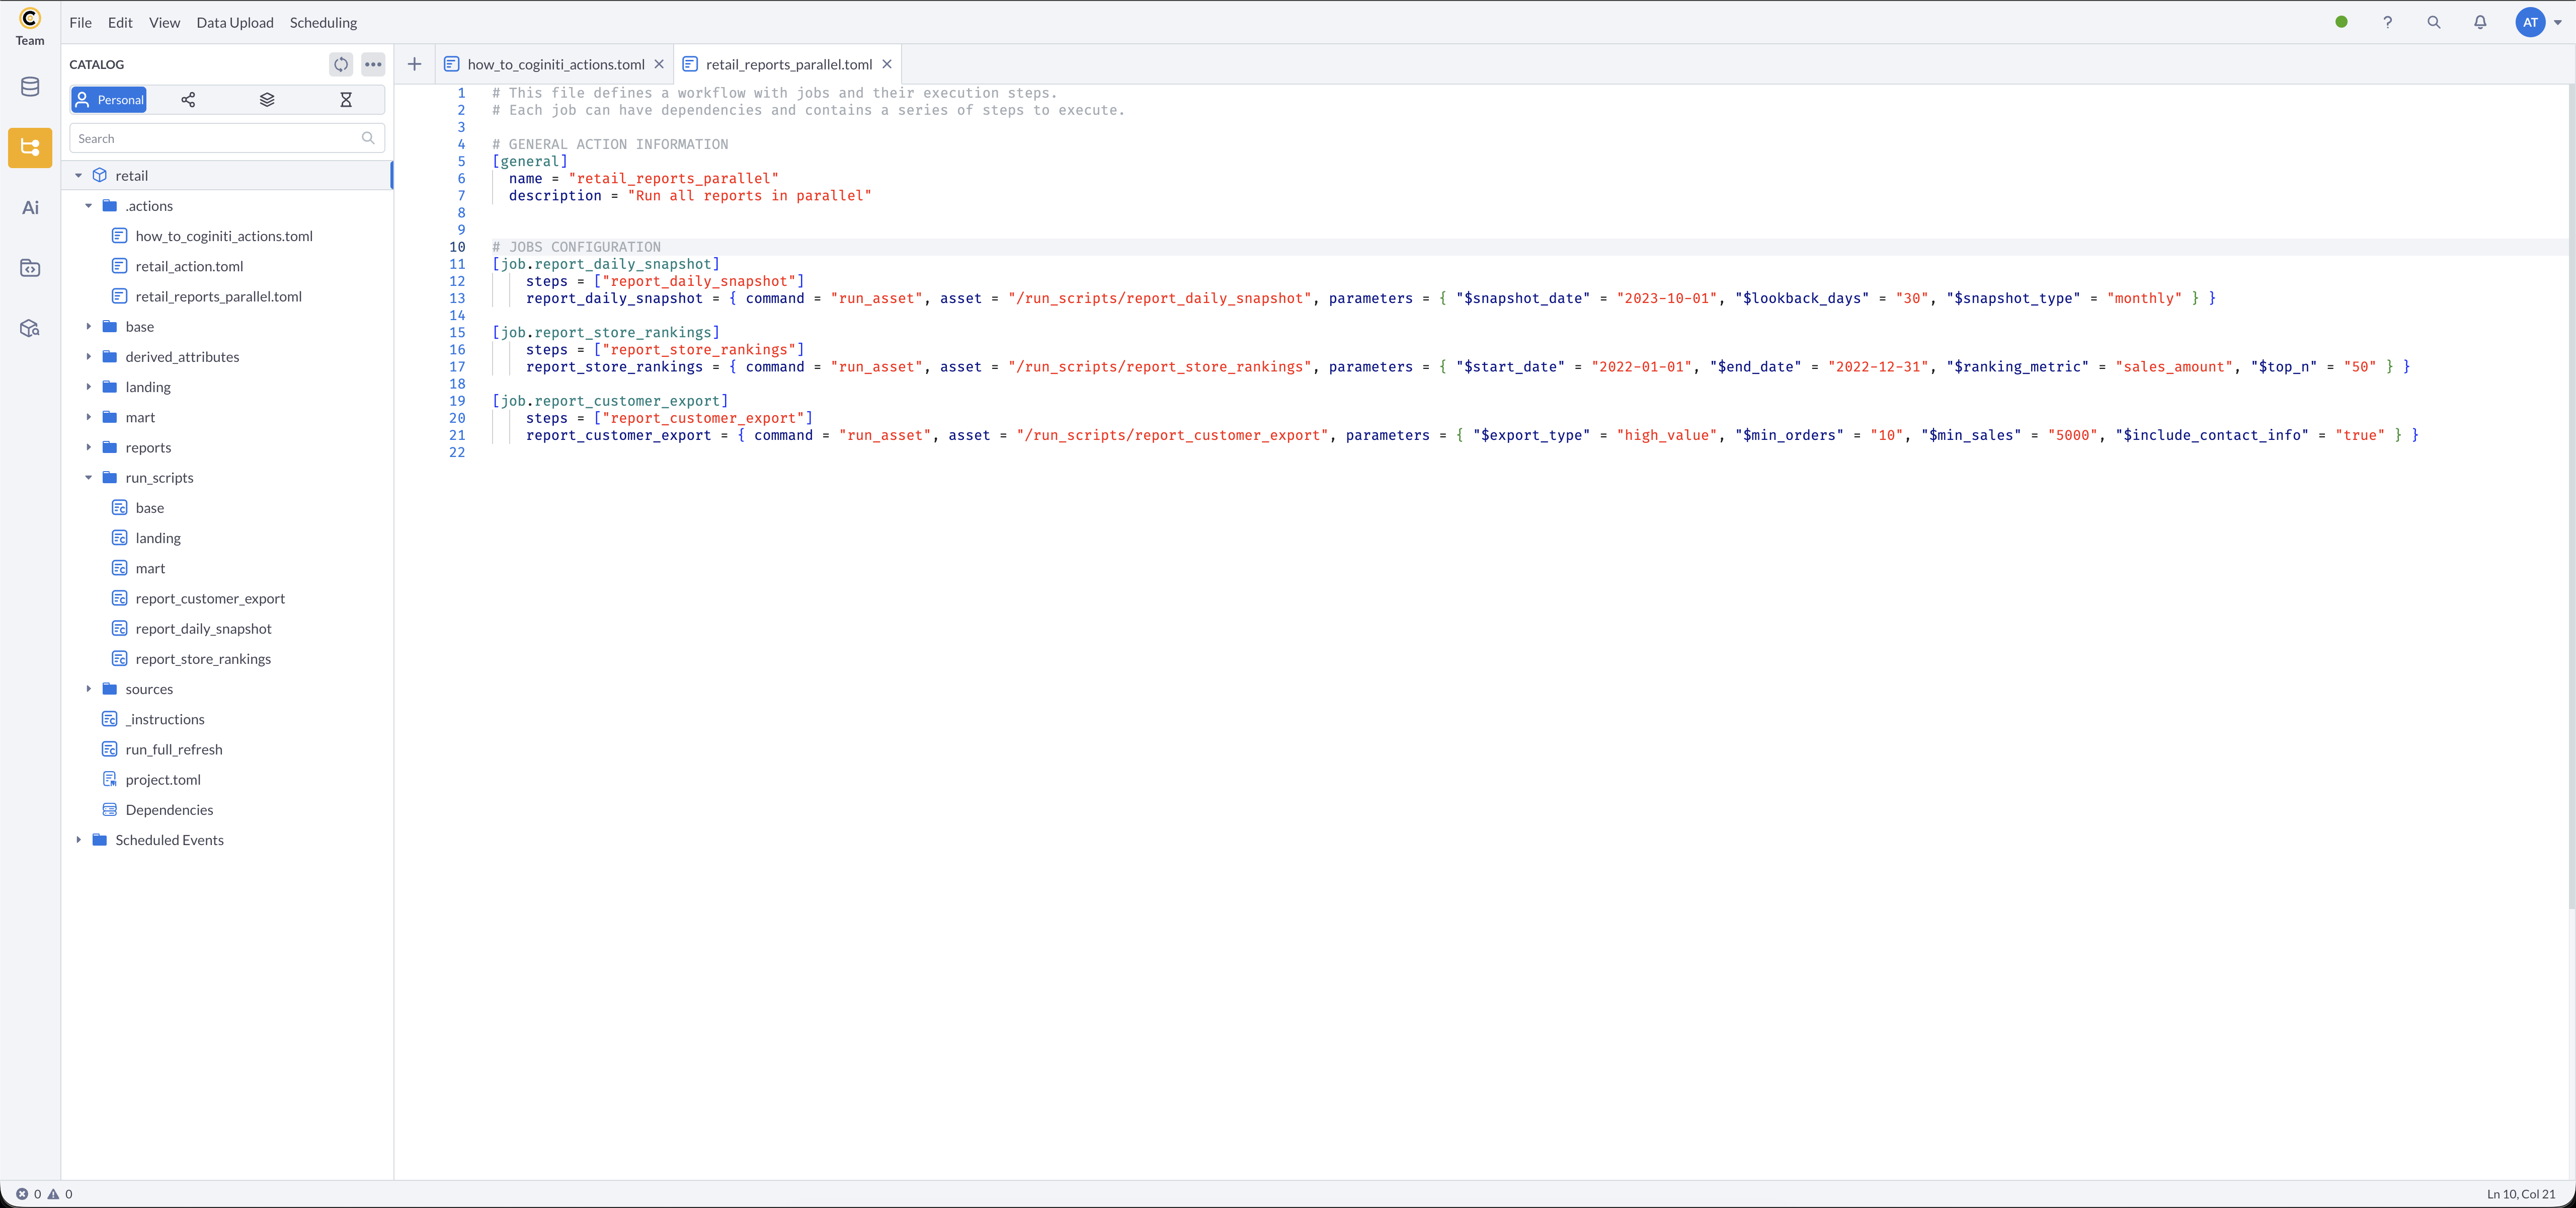
Jobs may run in parallel. To run multiple reports simultaneously, split them into separate jobs instead of sequential steps within one job:
[general]
    name = "retail_reports_parallel"
    description = "Run all reports in parallel"

[job.report_daily_snapshot]
    depends_on = ["mart"]
    steps = ["report_daily_snapshot"]
    report_daily_snapshot = { command = "run_asset", asset = "/run_scripts/report_daily_snapshot", parameters = { "$snapshot_date" = "2023-10-01", "$lookback_days" = "30", "$snapshot_type" = "monthly" } }

[job.report_store_rankings]
    depends_on = ["mart"]
    steps = ["report_store_rankings"]
    report_store_rankings = { command = "run_asset", asset = "/run_scripts/report_store_rankings", parameters = { "$start_date" = "2022-01-01", "$end_date" = "2022-12-31", "$ranking_metric" = "sales_amount", "$top_n" = "50" } }

[job.report_customer_export]
    depends_on = ["mart"]
    steps = ["report_customer_export"]
    report_customer_export = { command = "run_asset", asset = "/run_scripts/report_customer_export", parameters = { "$export_type" = "high_value", "$min_orders" = "10", "$min_sales" = "5000", "$include_contact_info" = "true" } }
Test Your Project Action
Validate Configuration
- Save your TOML file
- Verify syntax and asset references are correct
- Check that all dependencies are properly defined
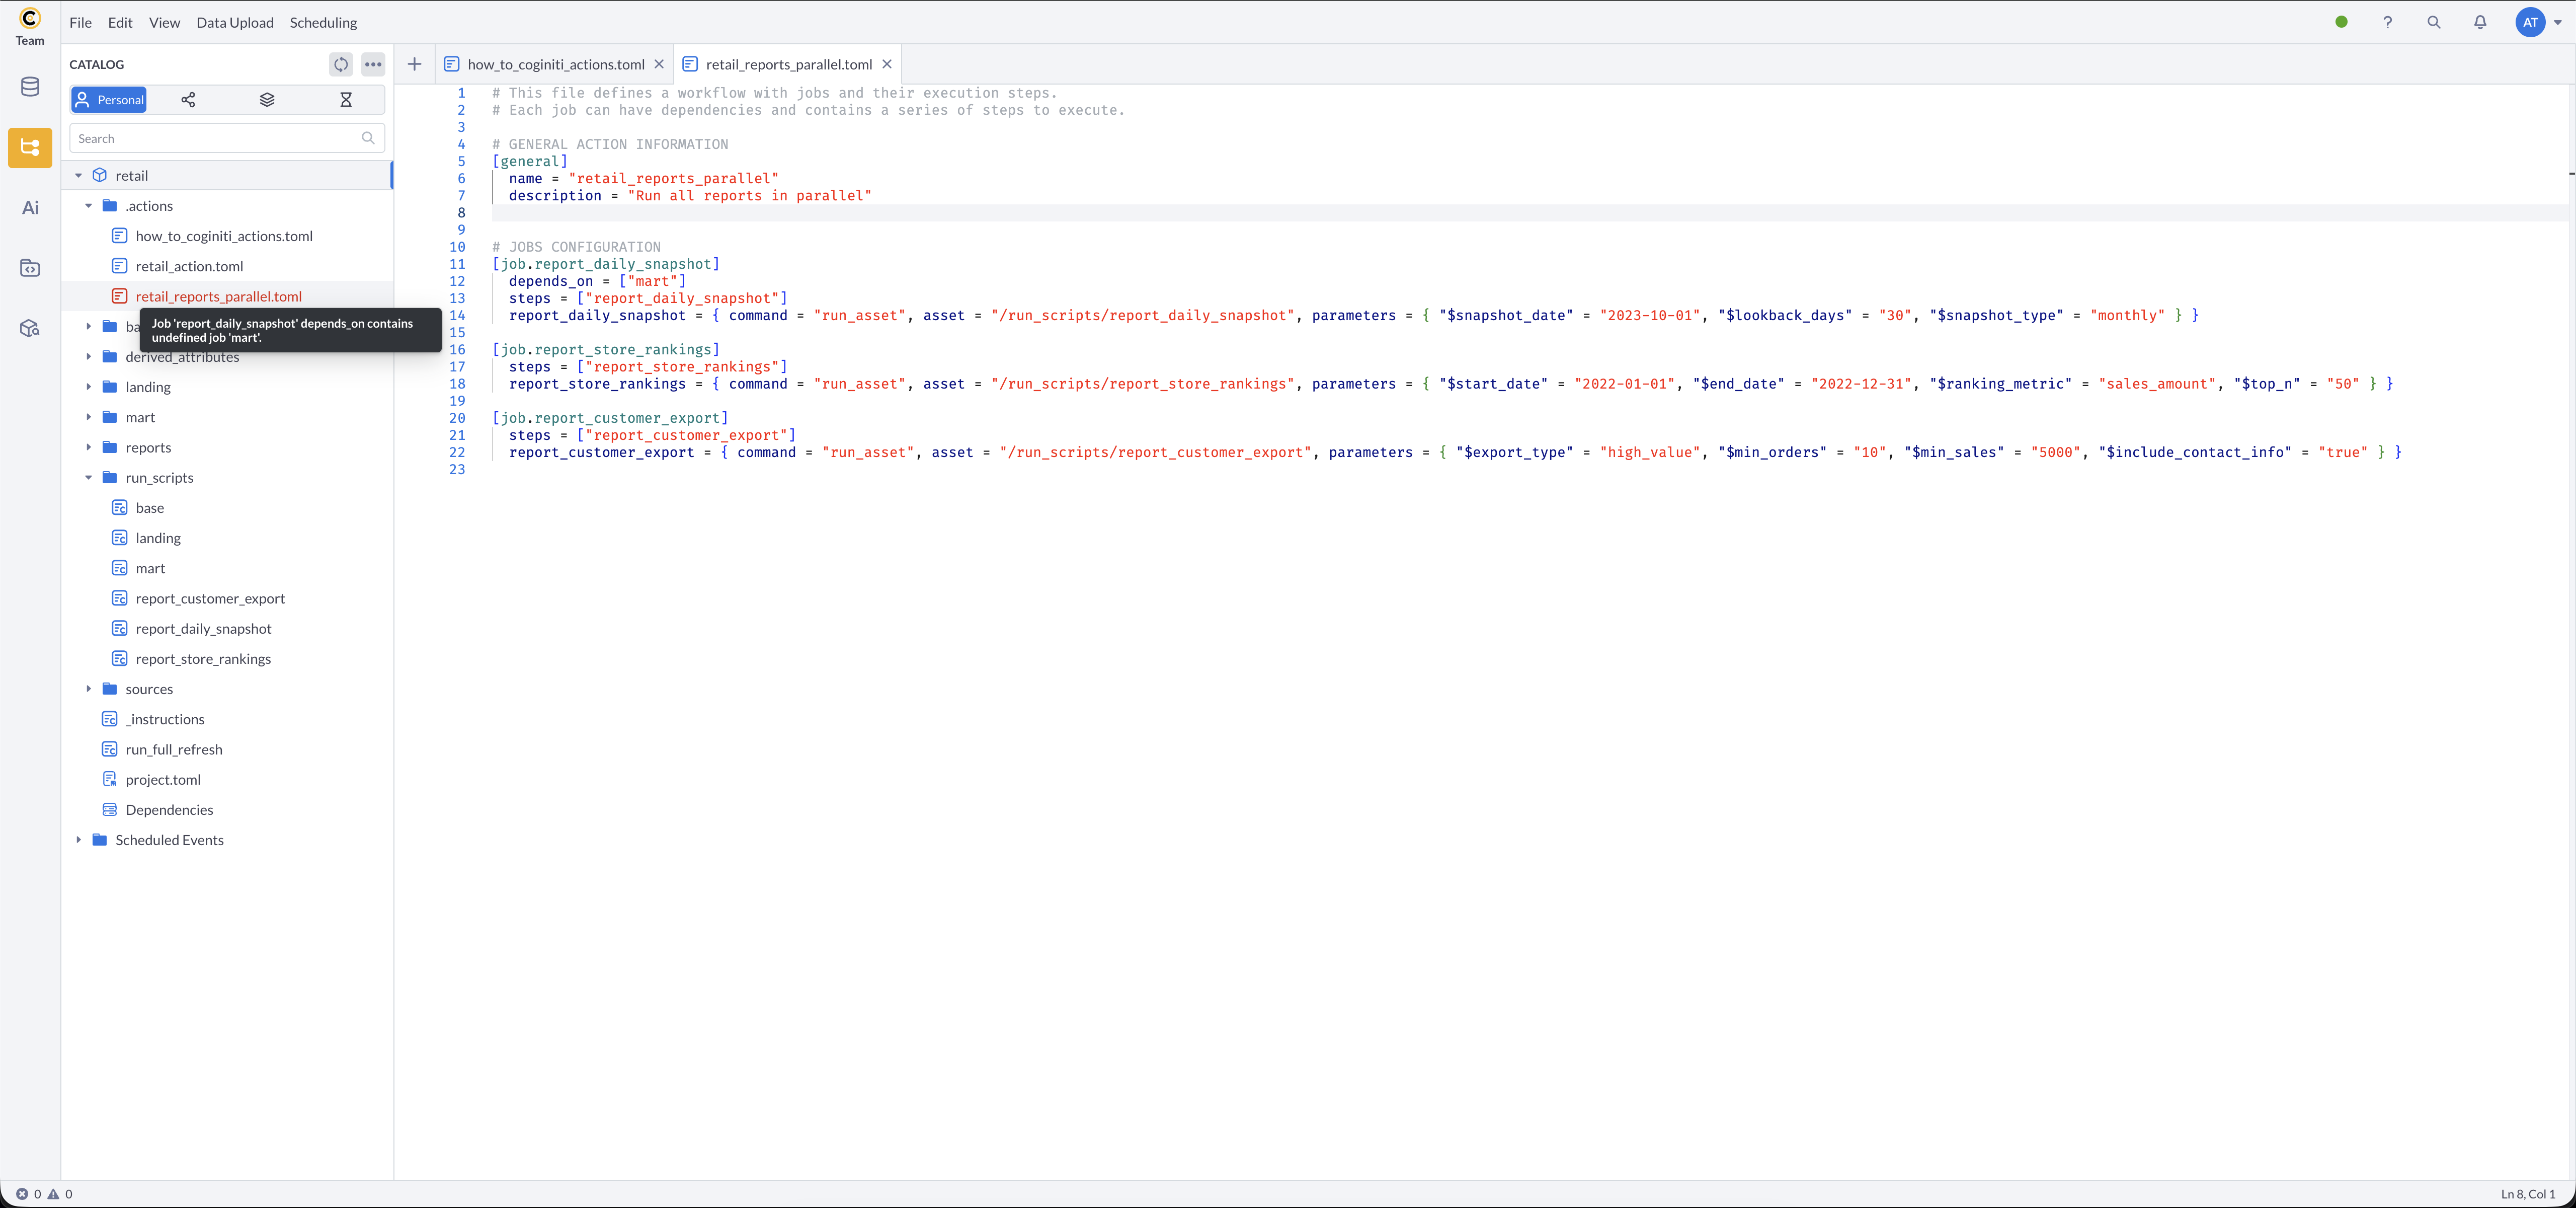
If required fields are missing or there are structural inconsistencies, the action file will be highlighted in red, and an error message will be available on hover.
Run Manually
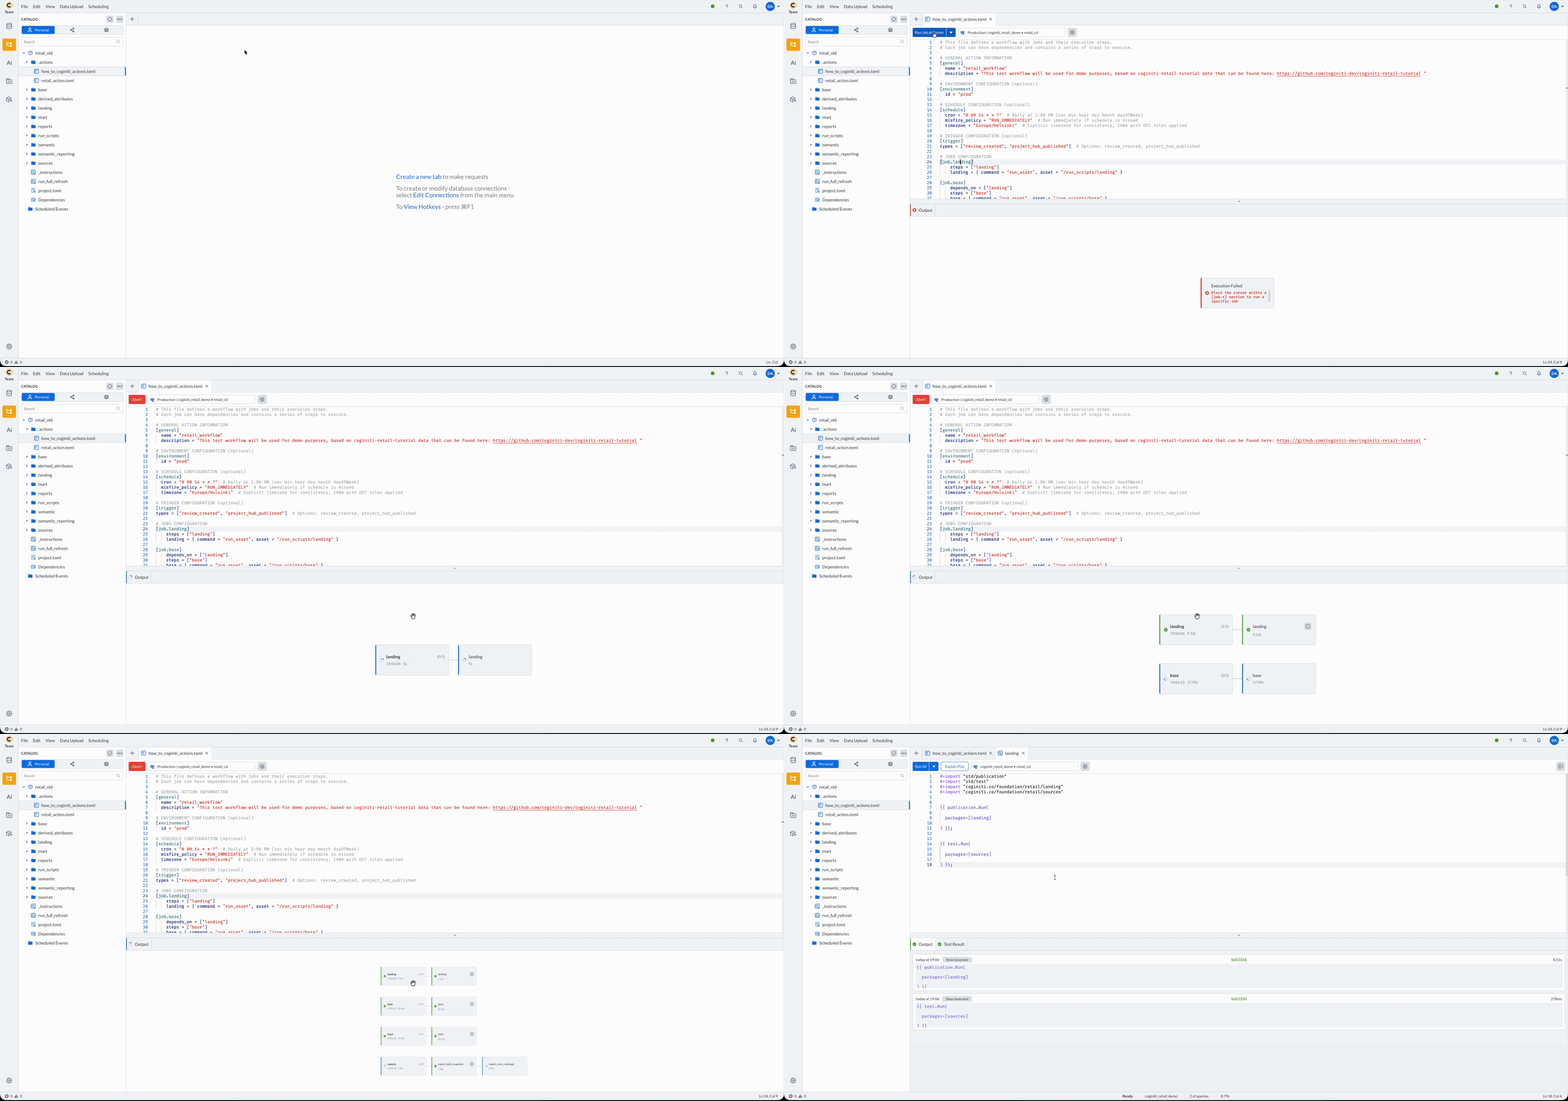
You can run an action on demand directly from the editor toolbar, without waiting for a schedule or trigger event:
- Run all jobs — executes every
[job.*]in the file, respecting thedepends_onordering. - Run job at current position — executes only the single job identified by the cursor's location.
To use Run job at current position, place the cursor directly on the job's header line — inside the [job.job_name] brackets. Putting the cursor elsewhere in the job's body (on a steps or step-definition line) does not select the job.
Unlike scheduled or triggered runs, the results of a manual run are displayed in the output, not the notification panel.
If the action uses parameters, a pop-up window appears before the manual run, letting you review and change the parameter values for that run.
Schedule for Testing
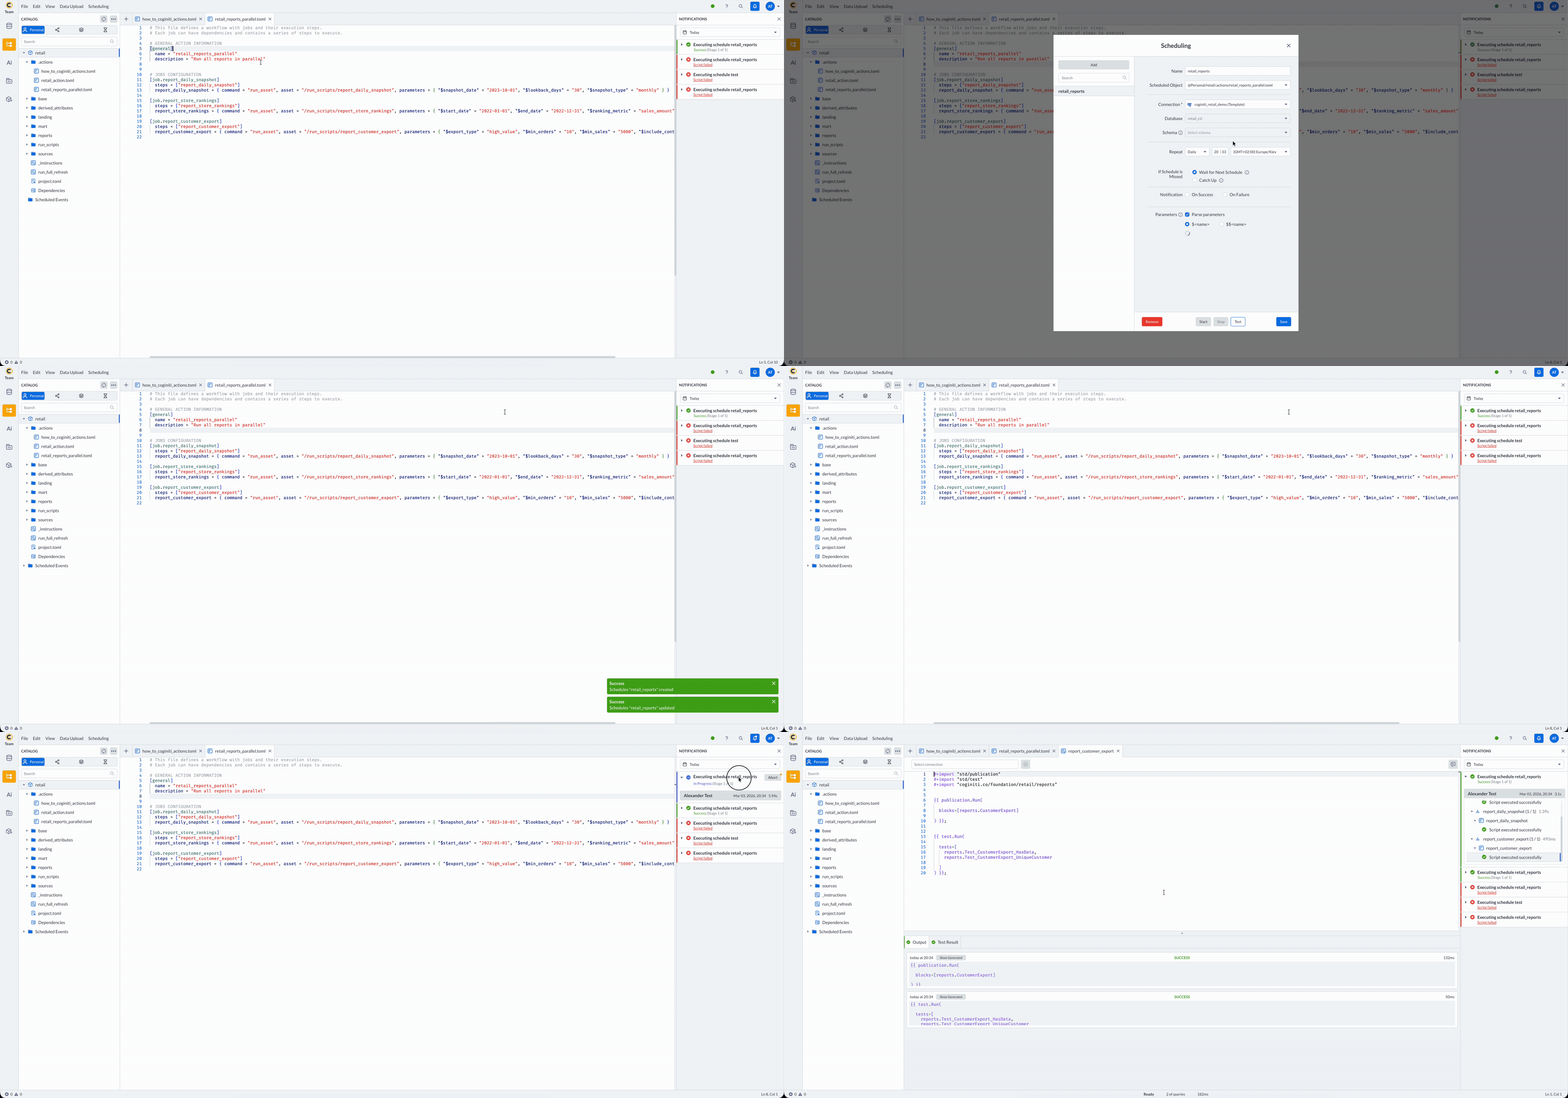
- Schedule your project action like any other catalog asset
- Set an immediate or near-future execution time
- Monitor execution through the notification panel
Troubleshooting
Common Issues
Syntax Errors
- Verify TOML syntax is correct
- Ensure all strings are properly quoted
- Check array formatting for
depends_onandsteps
Asset Path Errors
- Verify asset paths match catalog structure
- Ensure assets exist and are accessible
- Use forward slashes in paths
Dependency Loops
- Check that dependencies don't create circular references
- Use dependency visualization if available
Parameter Errors
- Ensure parameter names match SQL script placeholders
- Verify parameter values are properly formatted
- Check that required parameters are provided
Best Practices
- Use descriptive job and step names
- Add meaningful descriptions to your workflows
- Test with small datasets first
- Keep jobs focused on single responsibilities
- Document complex dependency relationships
See Coginiti Retail Project Complete Workflow Tutorial for real example.
For more information about other exciting Coginiti features visit our documentation