First steps with AI in Coginiti
Welcome! This tutorial walks you through your first hands-on experience with AI in Coginiti: connecting a provider, chatting with the AI assistant, using inline AI to explain, optimize, and edit SQL in place, and getting an AI explanation for a failed query.
What you'll learn
By the end of this tutorial, you'll have:
- Confirmed or configured an AI provider for your account
- Opened the AI panel and had a first conversation
- Used inline AI to explain, optimize, and edit a query
- Used AI to explain and fix a failed query
Prerequisites
- Access to a Coginiti instance (Pro, Team, or Enterprise)
- A database connection and an open query editor - if you don't have these yet, complete Getting Started with Coginiti first
- The examples below use the Coginiti Retail demo dataset (
mart.sale_return_factand related tables), available via thecoginiti_retail_democonnection template if your organization has set up the Coginiti Retail Project. Don't have it? Just adapt the table and column names to your own data. - If your admin hasn't already configured AI for your organization: an account with one of Coginiti's supported providers. OpenAI, Anthropic, Google Gemini, or a locally running Ollama are the fastest to set up with just an API key.
Step 1: Confirm or configure an AI provider
-
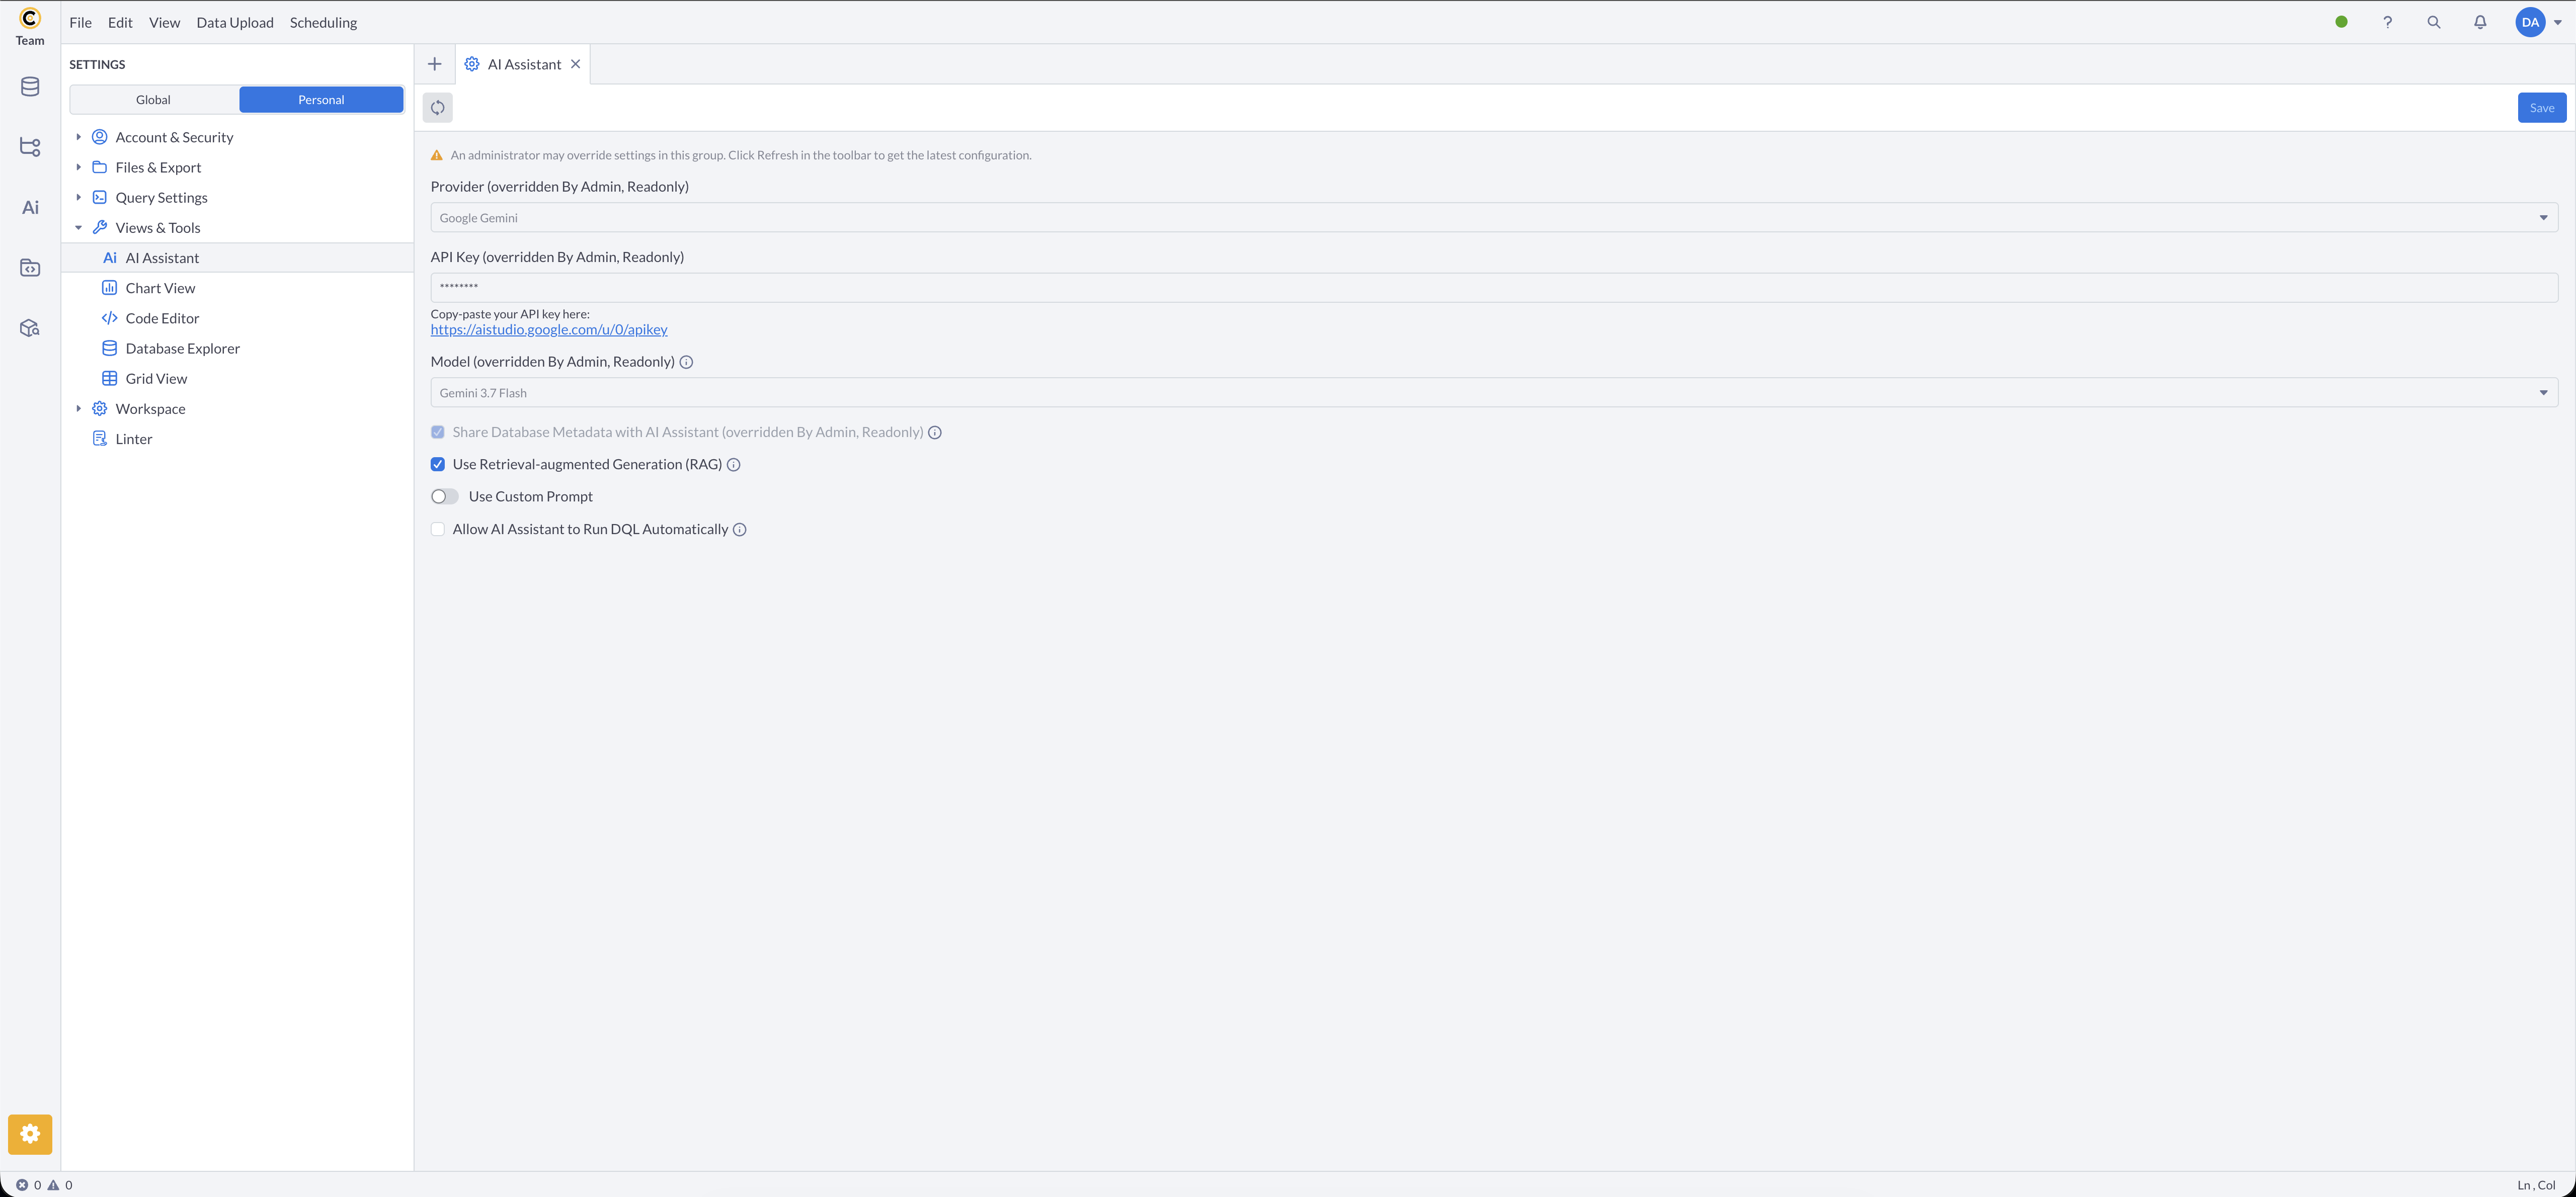
Check whether AI is already available:
- Open Settings (gear icon) → Account & Security → Views & Tools → AI Assistant
- If every field reads overridden by Admin, Readonly, your admin has already configured a provider - skip to Step 2
-
If nothing's configured yet, set up your own:
- On the same page, choose a Provider from the dropdown
- Paste in an API Key generated from that provider's own console
- Choose a Model from the ones your account has access to
- Click Save
For the full walkthrough, including organization-wide setup for admins, see How to Configure AI Assistant.
Step 2: Have your first chat
- Open the AI panel: click the AI icon in the left sidebar (alongside Database Explorer, Catalog, Files, and Project Reviews), or press Alt+7 in the browser, or Mod+7 in the desktop app.
- Click + New Chat.
- Ask a question about your data, for example: "What tables are available in my current connection?"
- Read the response. If the assistant needs more information, it asks instead of guessing - answer directly, choose Other to type a custom answer, or Skip.
- If the assistant offers to take an action, such as running a query, you'll see an approval prompt. Choose Allow to let it proceed this once.
Step 3: Try inline AI in the editor
Open a SQL tab in the query editor, then try each of the inline AI actions below.
Explain the query
-
Write a query with a join and an aggregation, for example:
SELECT
    bu.business_unit_name,
    SUM(f.gross_sales_amount) AS total_sales,
    SUM(f.sales_quantity) AS units_sold
FROM
    mart.sale_return_fact f
INNER JOIN
    mart.business_unit_dimension bu
    ON bu.business_unit_key = f.business_unit_key
GROUP BY
    bu.business_unit_name
ORDER BY
total_sales DESC; -
Select the query (or place your cursor in it), then press Mod+Alt+E, or right-click and choose AI: Explain SQL code.
-
Read the plain-language explanation of what the query does.
Optimize the query
-
Write a query with an obvious inefficiency, such as a correlated subquery, for example:
SELECT DISTINCT
    f.business_unit_key,
    (SELECT bu.business_unit_name
     FROM mart.business_unit_dimension bu
     WHERE bu.business_unit_key = f.business_unit_key) AS business_unit_name,
    f.gross_sales_amount
FROM
    mart.sale_return_fact f
WHERE
    f.transaction_date_key IN (
        SELECT date_key FROM mart.date_dimension WHERE business_day_date >= '2023-01-01'
); -
Select the query (or place your cursor in it), then press Mod+Alt+O, or right-click and choose AI: Optimize SQL code.
-
Review the suggested performance improvements, such as replacing the correlated subquery and the
INsubquery with joins.
Edit the query
-
Write a simple query, for example:
SELECT business_unit_key, sales_quantity FROM mart.sale_return_fact; -
Select the query (or place your cursor in it), then press Mod+L, or right-click and choose AI: Edit with Assistant (also available from the Edit menu).
-
Describe the change you want, for example: "add a WHERE clause to only include rows where sales_quantity is greater than 5."
-
Review the diff the assistant proposes, then click Apply if it looks right, or Reject if it doesn't.
Step 4: Explain a failed query
-
Run a query with a deliberate mistake, for example a misspelled column name:
SELECT business_unit_key, sales_quantityy FROM mart.sale_return_fact; -
When it fails, click the Explain Error button on the failed query output.
-
Read the AI's explanation of what went wrong, then fix the query using its suggestion.
Congratulations! 🎉
You've taken your first steps with AI in Coginiti:
✅ Connected an AI provider to your account
✅ Had a conversation with Forge or Guide
✅ Used inline AI to explain, optimize, and edit a query
✅ Used AI to explain and fix a failed query
Troubleshooting
The AI panel doesn't respond, or shows a connection error: see the Troubleshooting section of the configuration guide.
Mod+L, Mod+Alt+E, or Mod+Alt+O doesn't do anything: the inline assistant is available to User and Admin roles only - see How to Use AI in the SQL Editor.
Next steps
- Using the AI Chat - chat history, sharing, and more on approving actions
- Forge and Guide Explained - what each assistant can do, and why they differ
- AI in Coginiti Overview - the full map of AI features
For more information about other exciting Coginiti features visit our documentation